Classic Cold-Proofed Sourdough Boule - Cast Iron Method
The easiest way to bake bakery-level sourdough at home. Cold-proof overnight, bake in a cast iron, and let the oven do the heavy lifting. This is the classic sourdough boule recipe that started it all. Perfect for beginners and satisfying every single time.
Instructions
- 1
FEED YOUR STARTER: Start your day by giving your starter the nourishment it needs to become your leavening powerhouse. In a clean jar, combine 50g of your existing starter with 50g of bread flour and 50g of room temperature water. Stir vigorously until no dry flour remains and the mixture looks like a smooth, thick batter — a good 30 to 45 seconds of stirring makes a real difference here. Mark the jar with a rubber band or piece of tape so you can watch it rise. Over the next 6 to 8 hours, your starter will bubble up, dome at the top, and fill the kitchen with that beautifully tangy, yeasty aroma. It's ready to use when it has at least doubled in size, looks domed or just beginning to fall, and feels airy when you stir it. For extra confidence, drop a small spoonful into a glass of water — if it floats, your starter is alive, active, and absolutely ready to make magic.
- 2
MIX YOUR DOUGH: Once your starter is domed, bubbly, and passing the float test, it's time to build your dough. Grab a large mixing bowl and pour in all 350g of room temperature water. Add the 120g of active starter and stir enthusiastically until the starter is fully dissolved into the water — the mixture should look milky and slightly frothy, with no visible clumps of starter remaining. Next, add 10g of fine sea salt directly into the water and stir again until dissolved. Now add all 500g of bread flour at once. Using a silicone spatula, fold and press the mixture together until every last bit of dry flour has been absorbed. The dough will look rough, shaggy, and a little sticky right now — that is completely perfect and exactly what you want. There's no autolyse in this method; the stretch and fold sets coming up will develop your gluten beautifully. Cover the bowl with a damp towel and let it rest for 30 minutes before your first stretch and fold.
- 3
STRETCH & FOLDS: Over the next 2 to 3 hours at room temperature, you'll perform 3 sets of stretch and folds, spaced 45 to 60 minutes apart. This is how you build strength and structure into your dough without kneading. For each set, wet your hand slightly to prevent sticking, then reach under one side of the dough, stretch it up as high as it will go without tearing, and fold it over to the opposite side. Rotate the bowl a quarter turn and repeat — four folds total complete one set. During the first set, the dough will feel quite slack and sticky — don't panic, that's normal. By the second set, you'll notice it starting to smooth out and hold its shape a little better. By the third set, the dough should feel noticeably more elastic, slightly pillowy, and pull away from the sides of the bowl cleanly. After the final set, let the dough continue its room temperature bulk ferment for the remainder of the 3 to 4 hour window (from the time you mixed), until it has grown by about 50 to 75%, looks puffy, and you can see bubbles forming on the surface and sides of the bowl. This is your bulk ferment completing at room temperature — the dough should feel airy and alive when you give the bowl a gentle shake.
- 4
COLD OVERNIGHT PROOF (IN BANNETON): Here's where this recipe takes a beautiful turn — instead of a cold bulk ferment, you'll shape the dough now and let the cold proof happen in the banneton overnight. This approach gives you full flavor development, a firm dough that's incredibly easy to score in the morning, and serious bragging rights. Generously dust a round banneton with a mixture of rice flour and bread flour — rice flour is especially great here because it doesn't absorb moisture and ensures the dough releases cleanly. Lightly flour your work surface and gently turn the dough out. Using a bench scraper and your free hand, work the dough into a round shape by tucking the edges underneath, rotating the dough as you go, building surface tension — you're looking for a smooth, taut surface on top with a pinched seam on the bottom. Place the shaped boule seam-side UP into your prepared banneton. Cover with a shower cap, reusable plastic wrap, or a lightly oiled piece of plastic wrap, then wrap a kitchen towel around the whole thing for insulation. Slide it into the refrigerator and let it cold proof for 8 to 14 hours overnight. The cold slows fermentation to a near-halt, allowing the flavors to deepen and the gluten structure to firm up — making for a loaf that scores like a dream in the morning.
- 5
PREHEAT YOUR CAST IRON DUTCH OVEN: When you're ready to bake, don't touch the dough yet — it goes straight from the fridge into the oven. Place your cast iron Dutch oven (with the lid on) into your oven and preheat to 500°F (260°C). Let it heat for a full 45 to 60 minutes. This is not optional. A scorching-hot Dutch oven is what creates that incredible ear, blistered crust, and dramatic oven spring you're working toward. While the oven heats, tear off a sheet of parchment paper large enough to sling your loaf into the pot, and set it nearby. This is a great moment to take a deep breath, make a coffee, and feel genuinely proud of what you're about to pull out of that fridge.
- 6
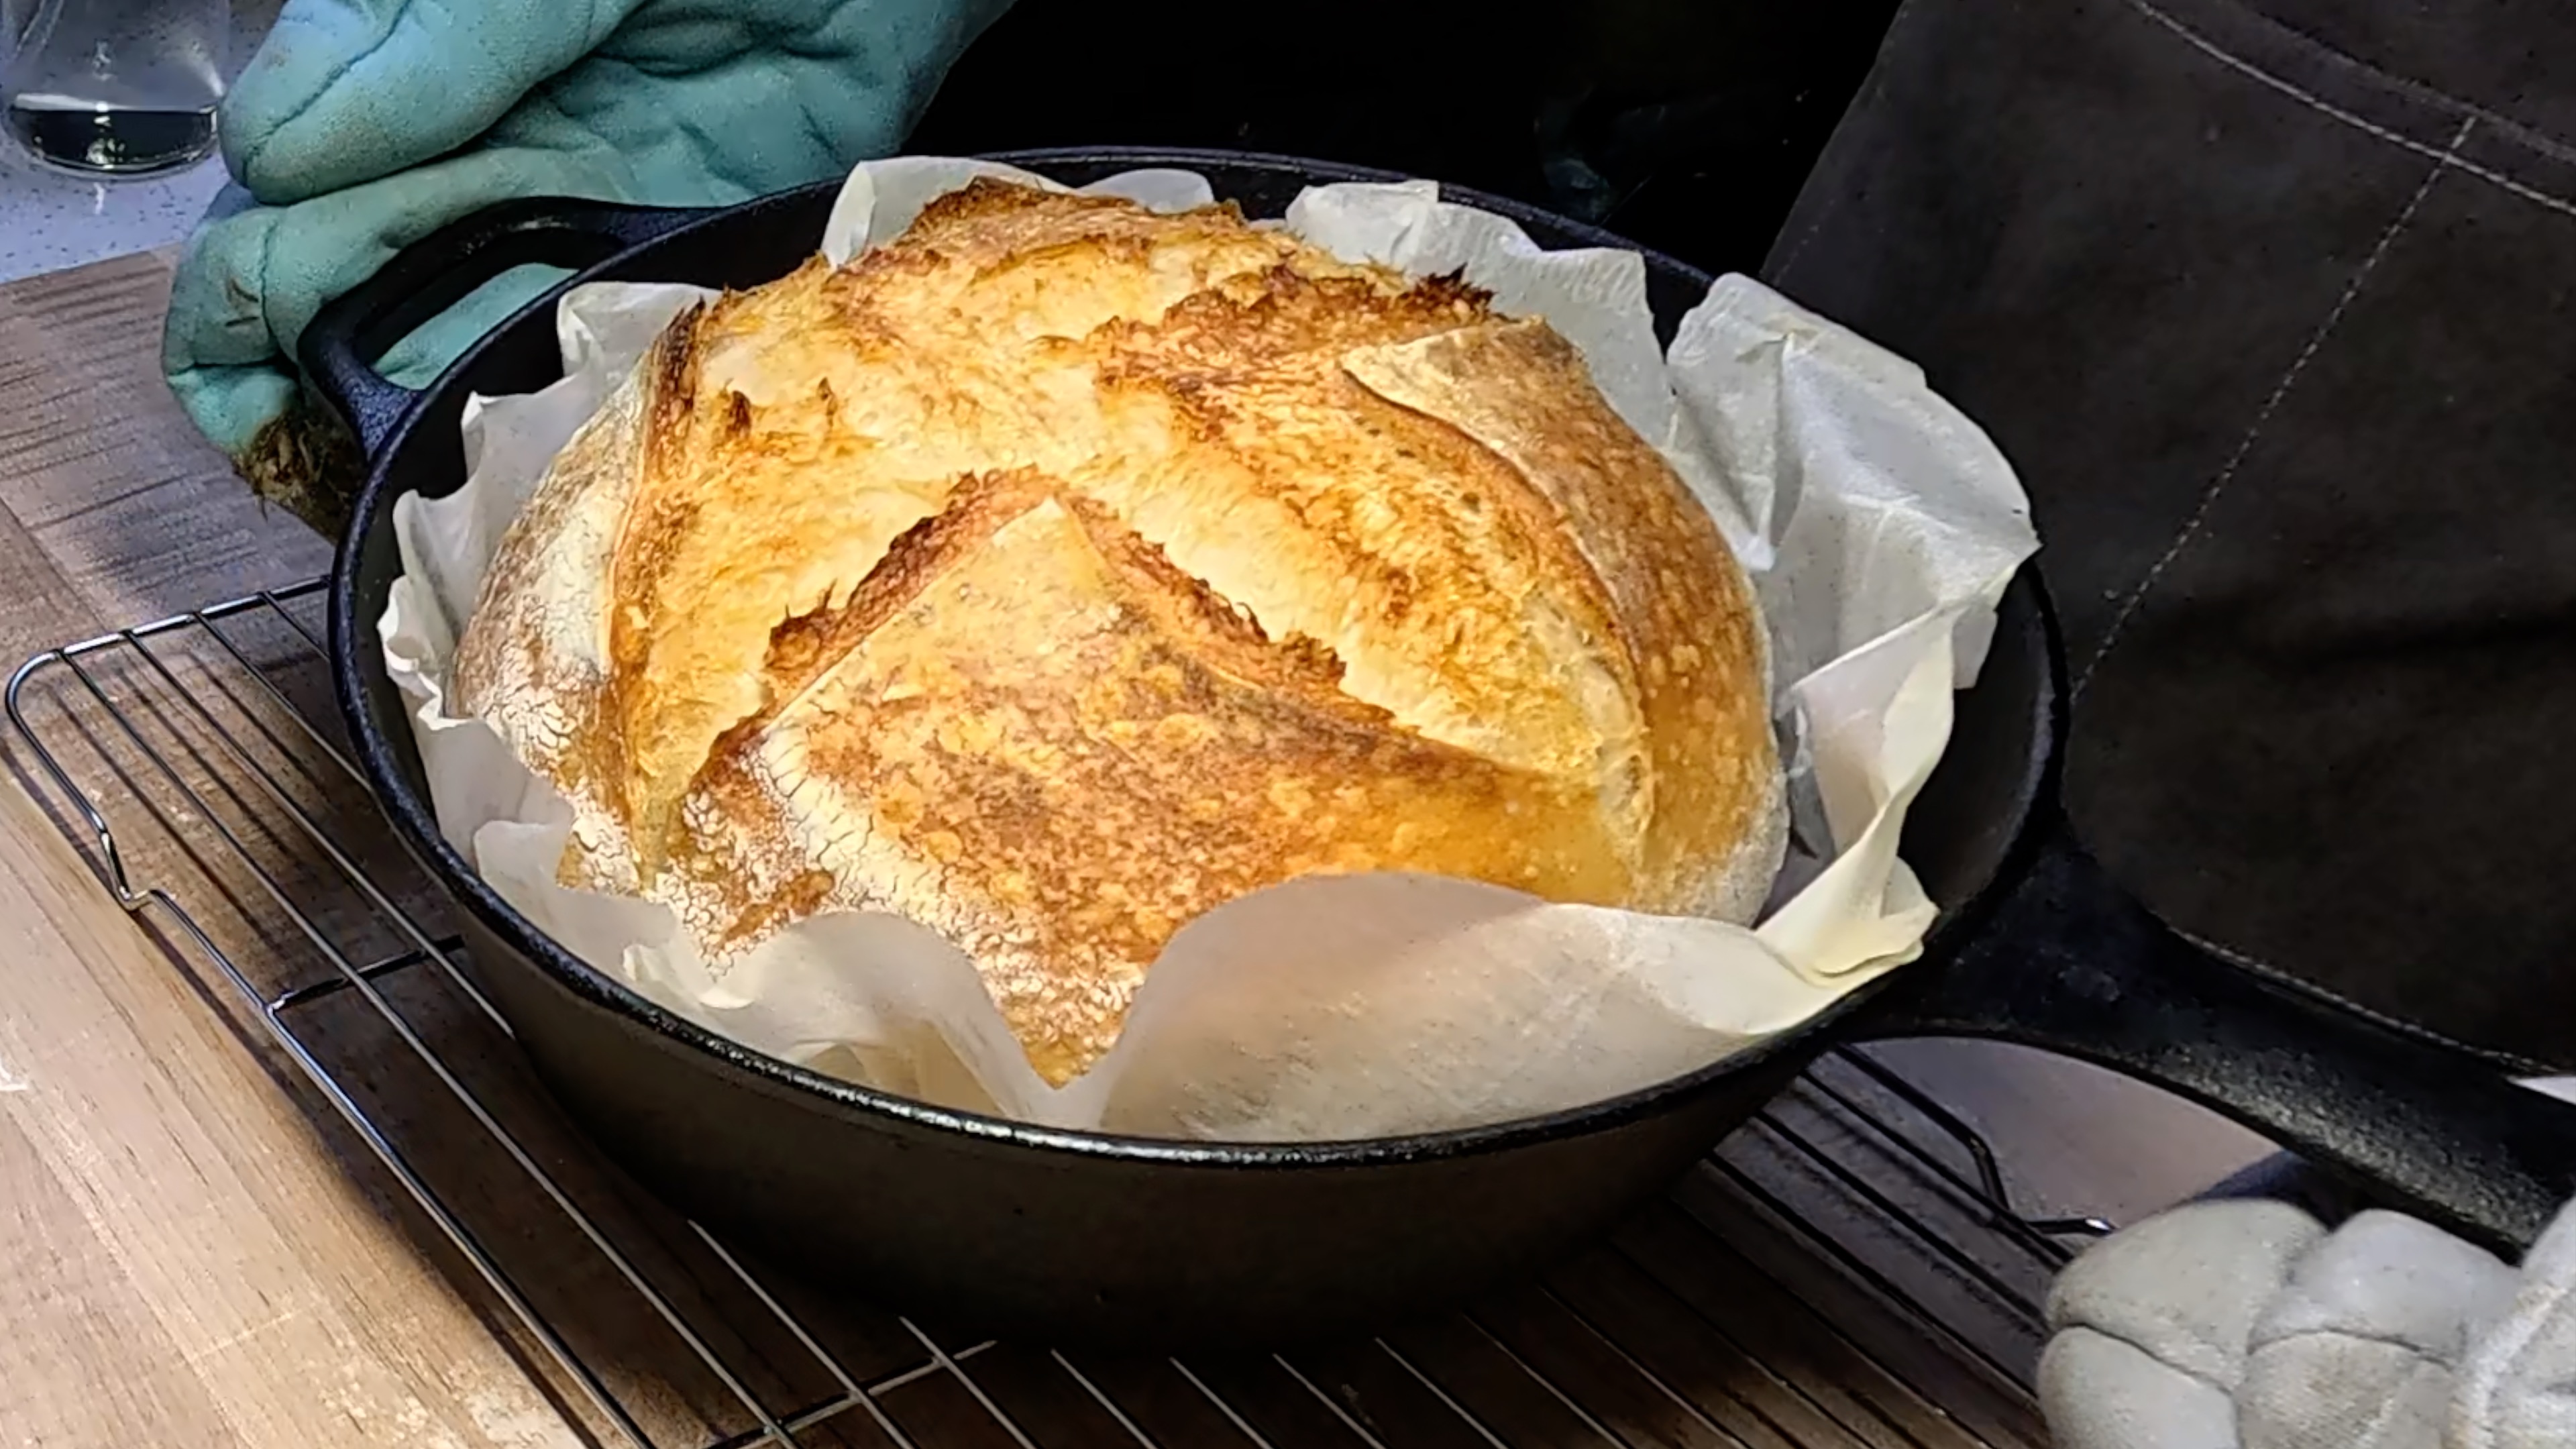
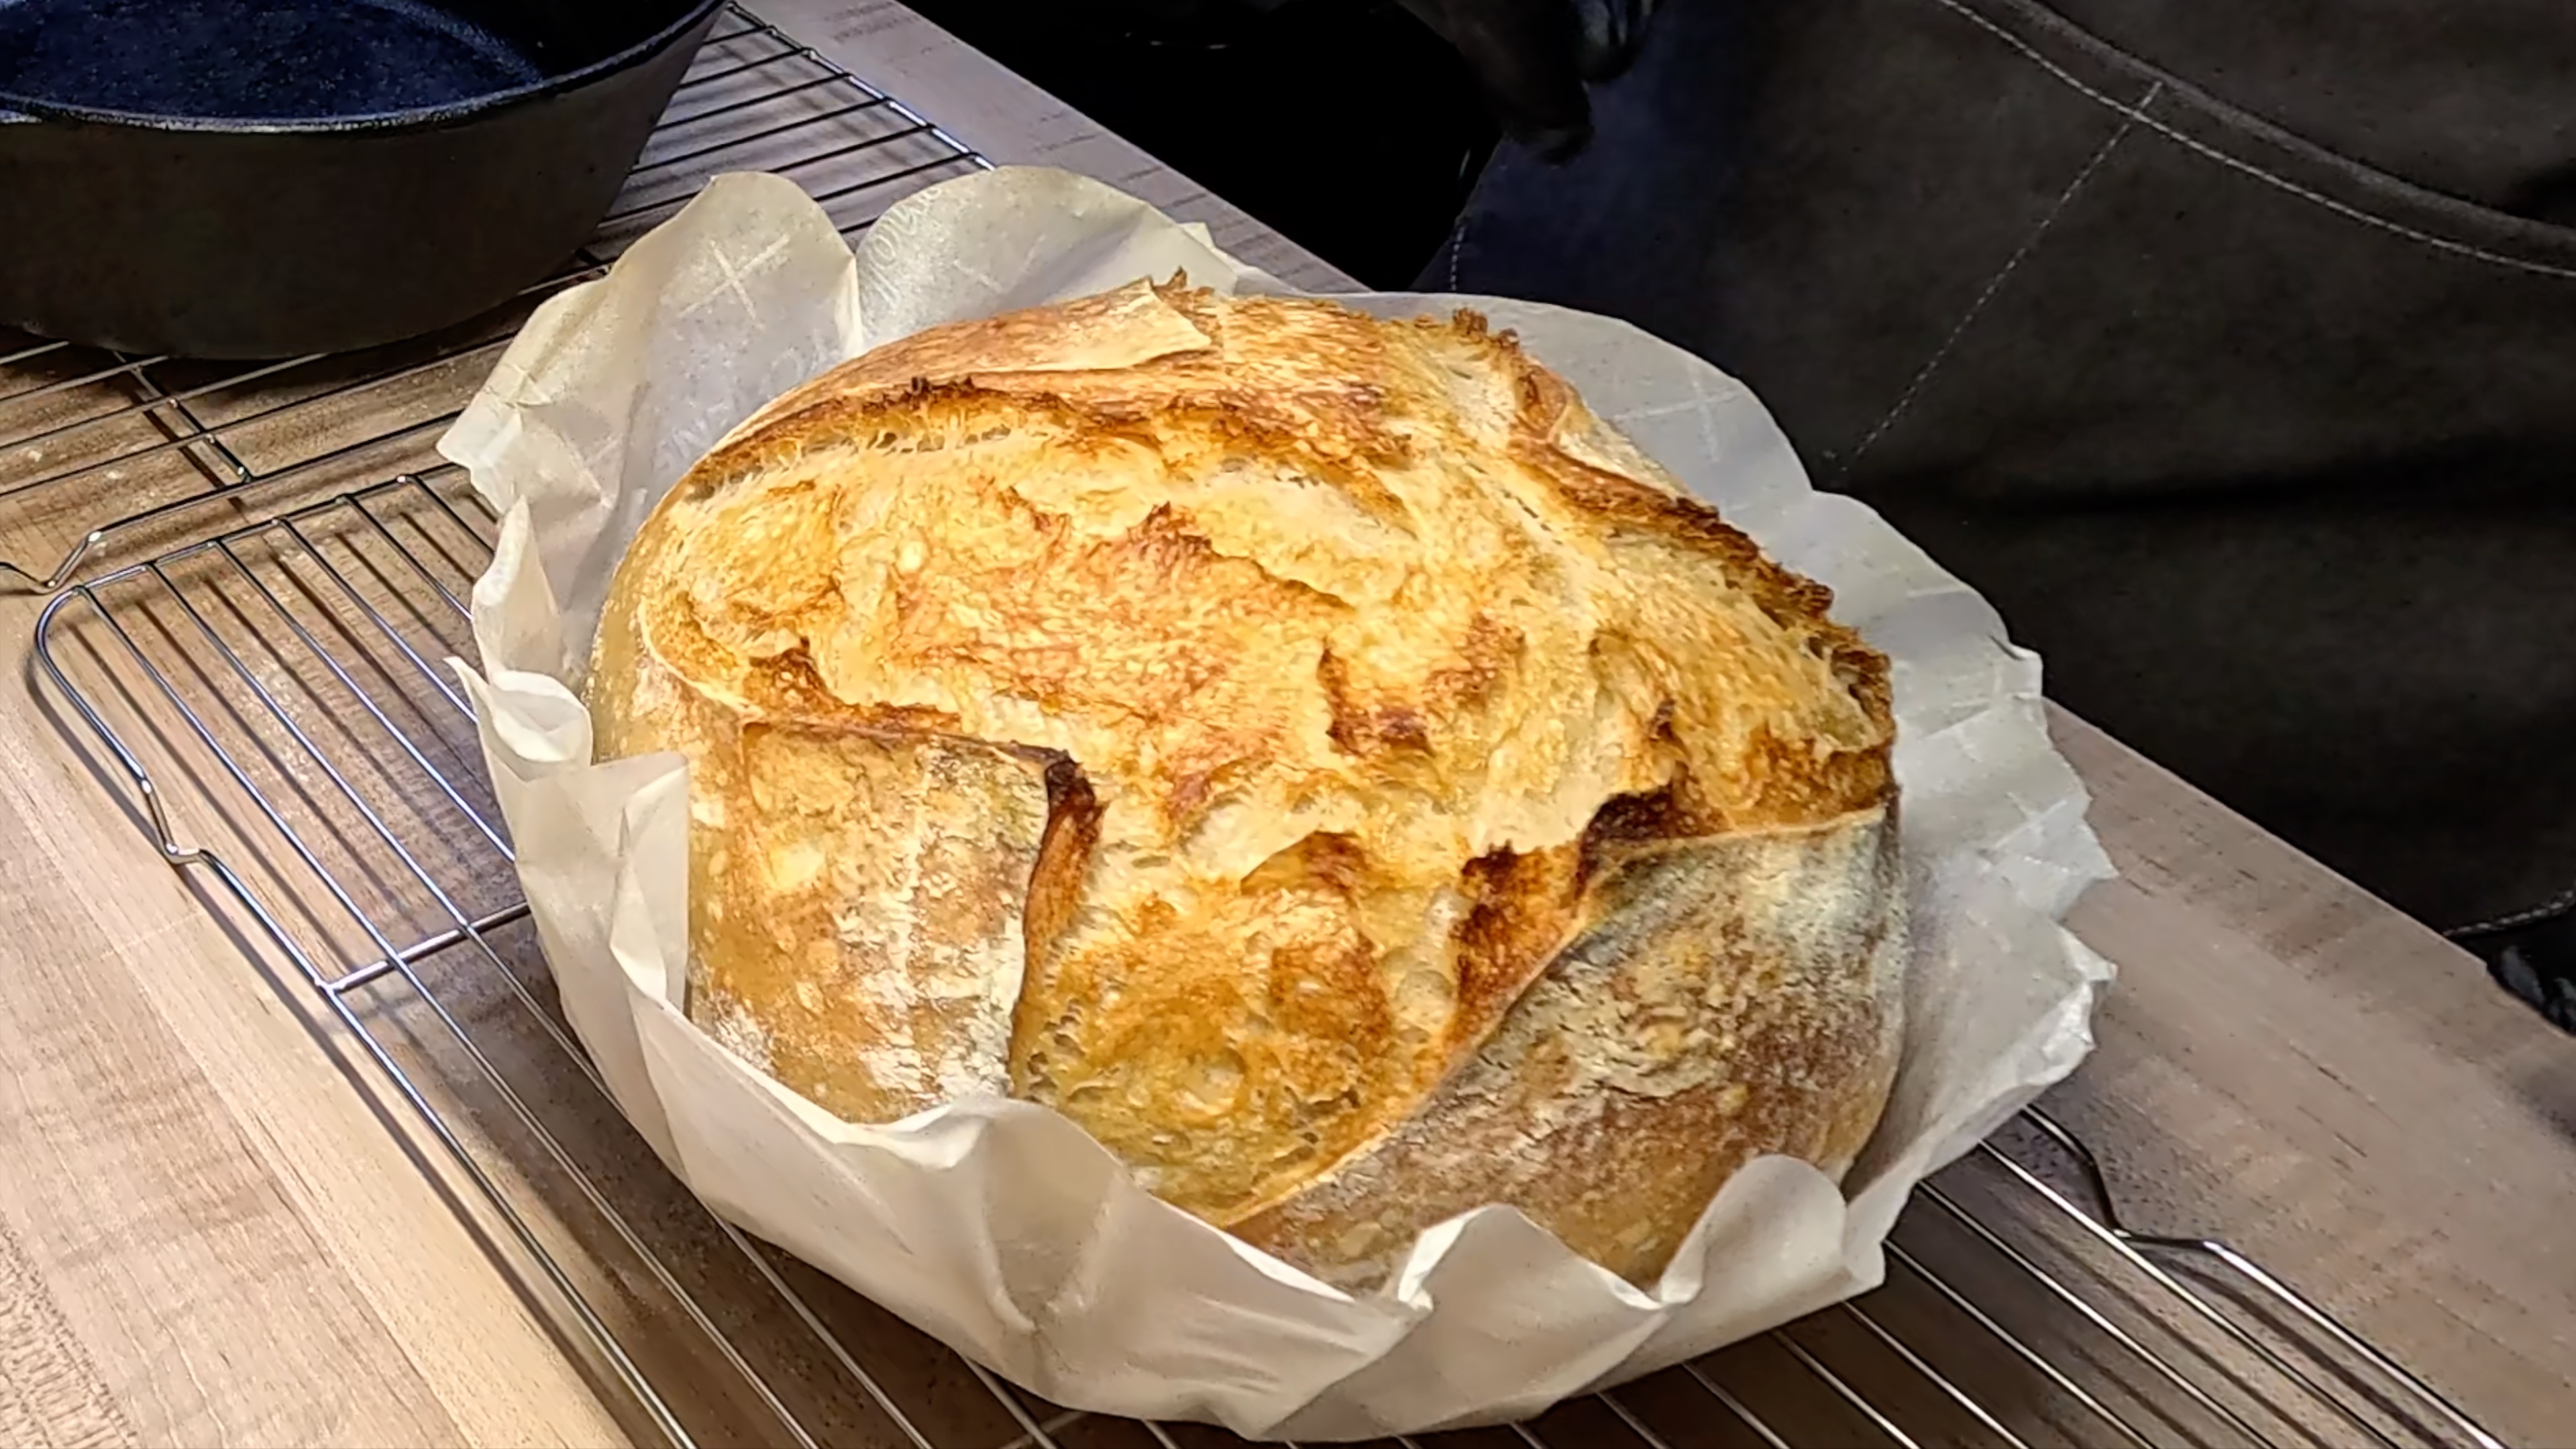
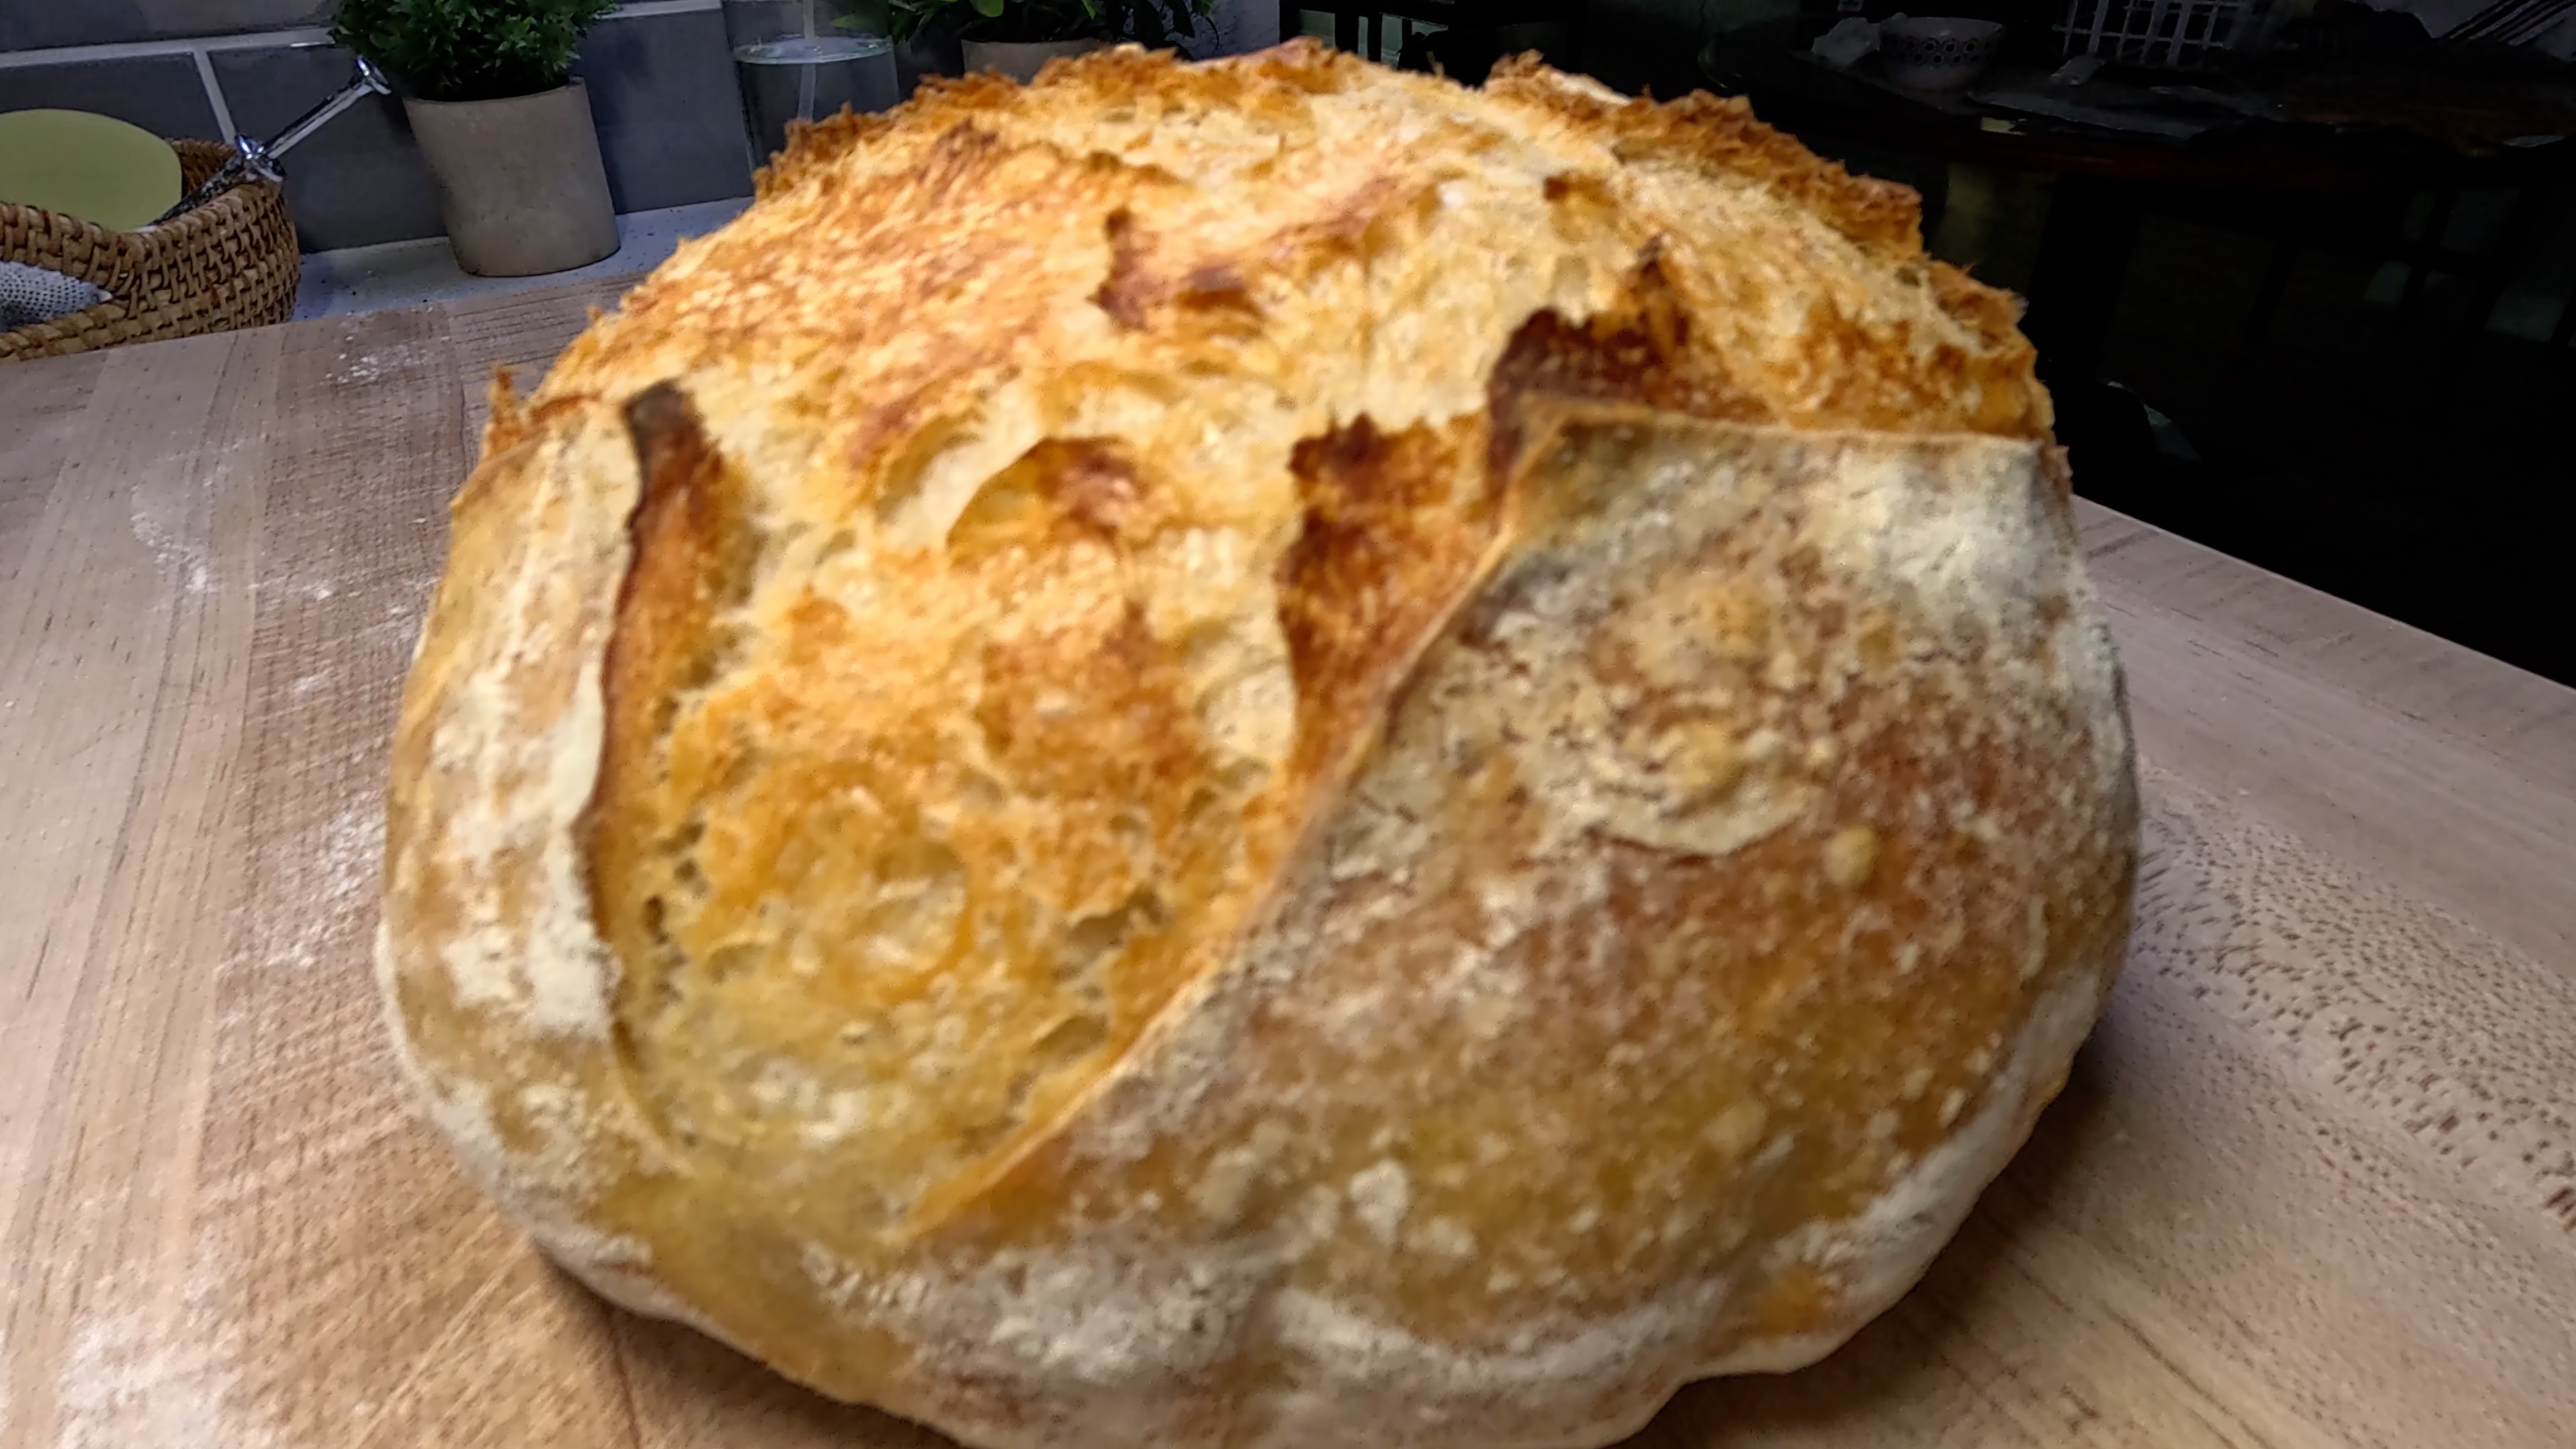
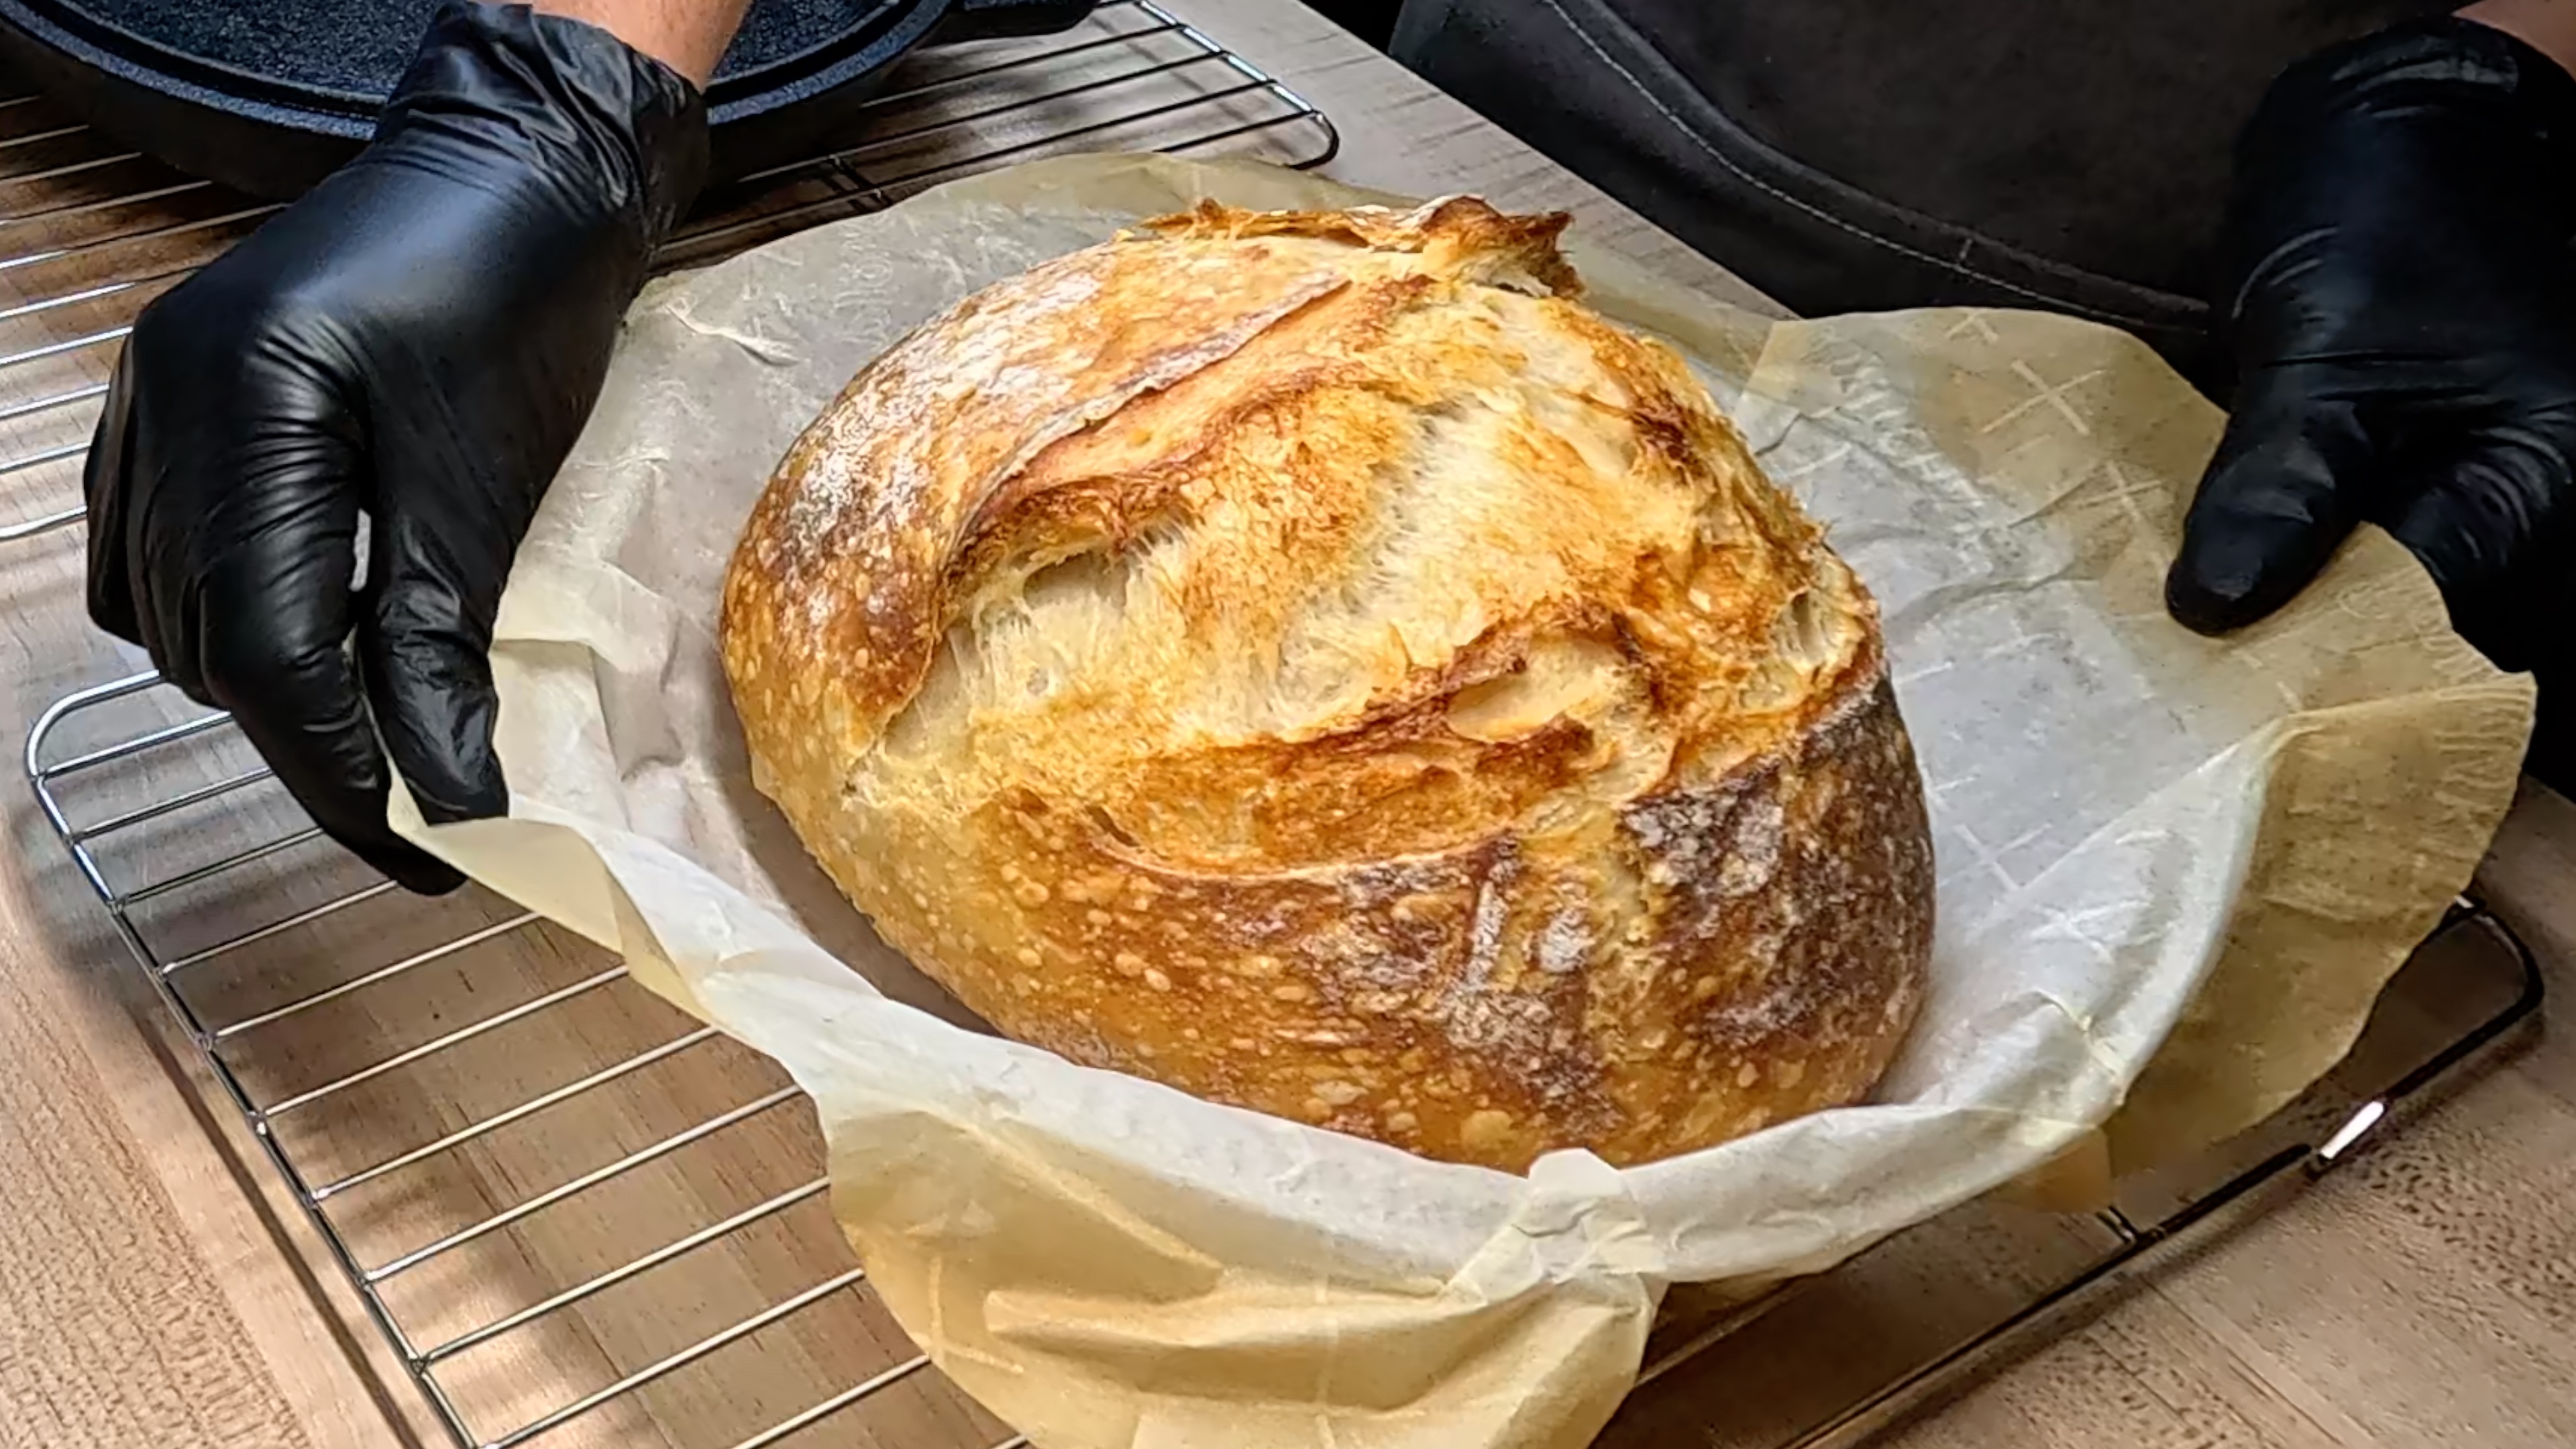
SCORE YOUR BOULE: Now for the most satisfying moment in sourdough baking. Remove your banneton from the refrigerator - the dough should feel firm and cold to the touch, which makes it ideal for scoring. Place your sheet of parchment paper on a flat surface and quickly invert the banneton so the dough drops gently seam-side DOWN onto the parchment. Peel away the banneton — if you dusted generously, it should release in one clean, breathtaking moment. Working quickly (cold dough doesn't stay cold forever), use a sharp bread lame or a razor blade held at roughly a 30 to 45-degree angle to score a diagonal cross cut: two intersecting slashes across the top of the boule, each about 4 to 5 inches long, forming an 'X' pattern. Cut with confidence and a single, fluid motion — hesitation leads to dragging, and you want clean, decisive cuts. The scoring guides the oven spring, giving the loaf a place to burst open beautifully and creating that gorgeous, caramelized ear.
- 7
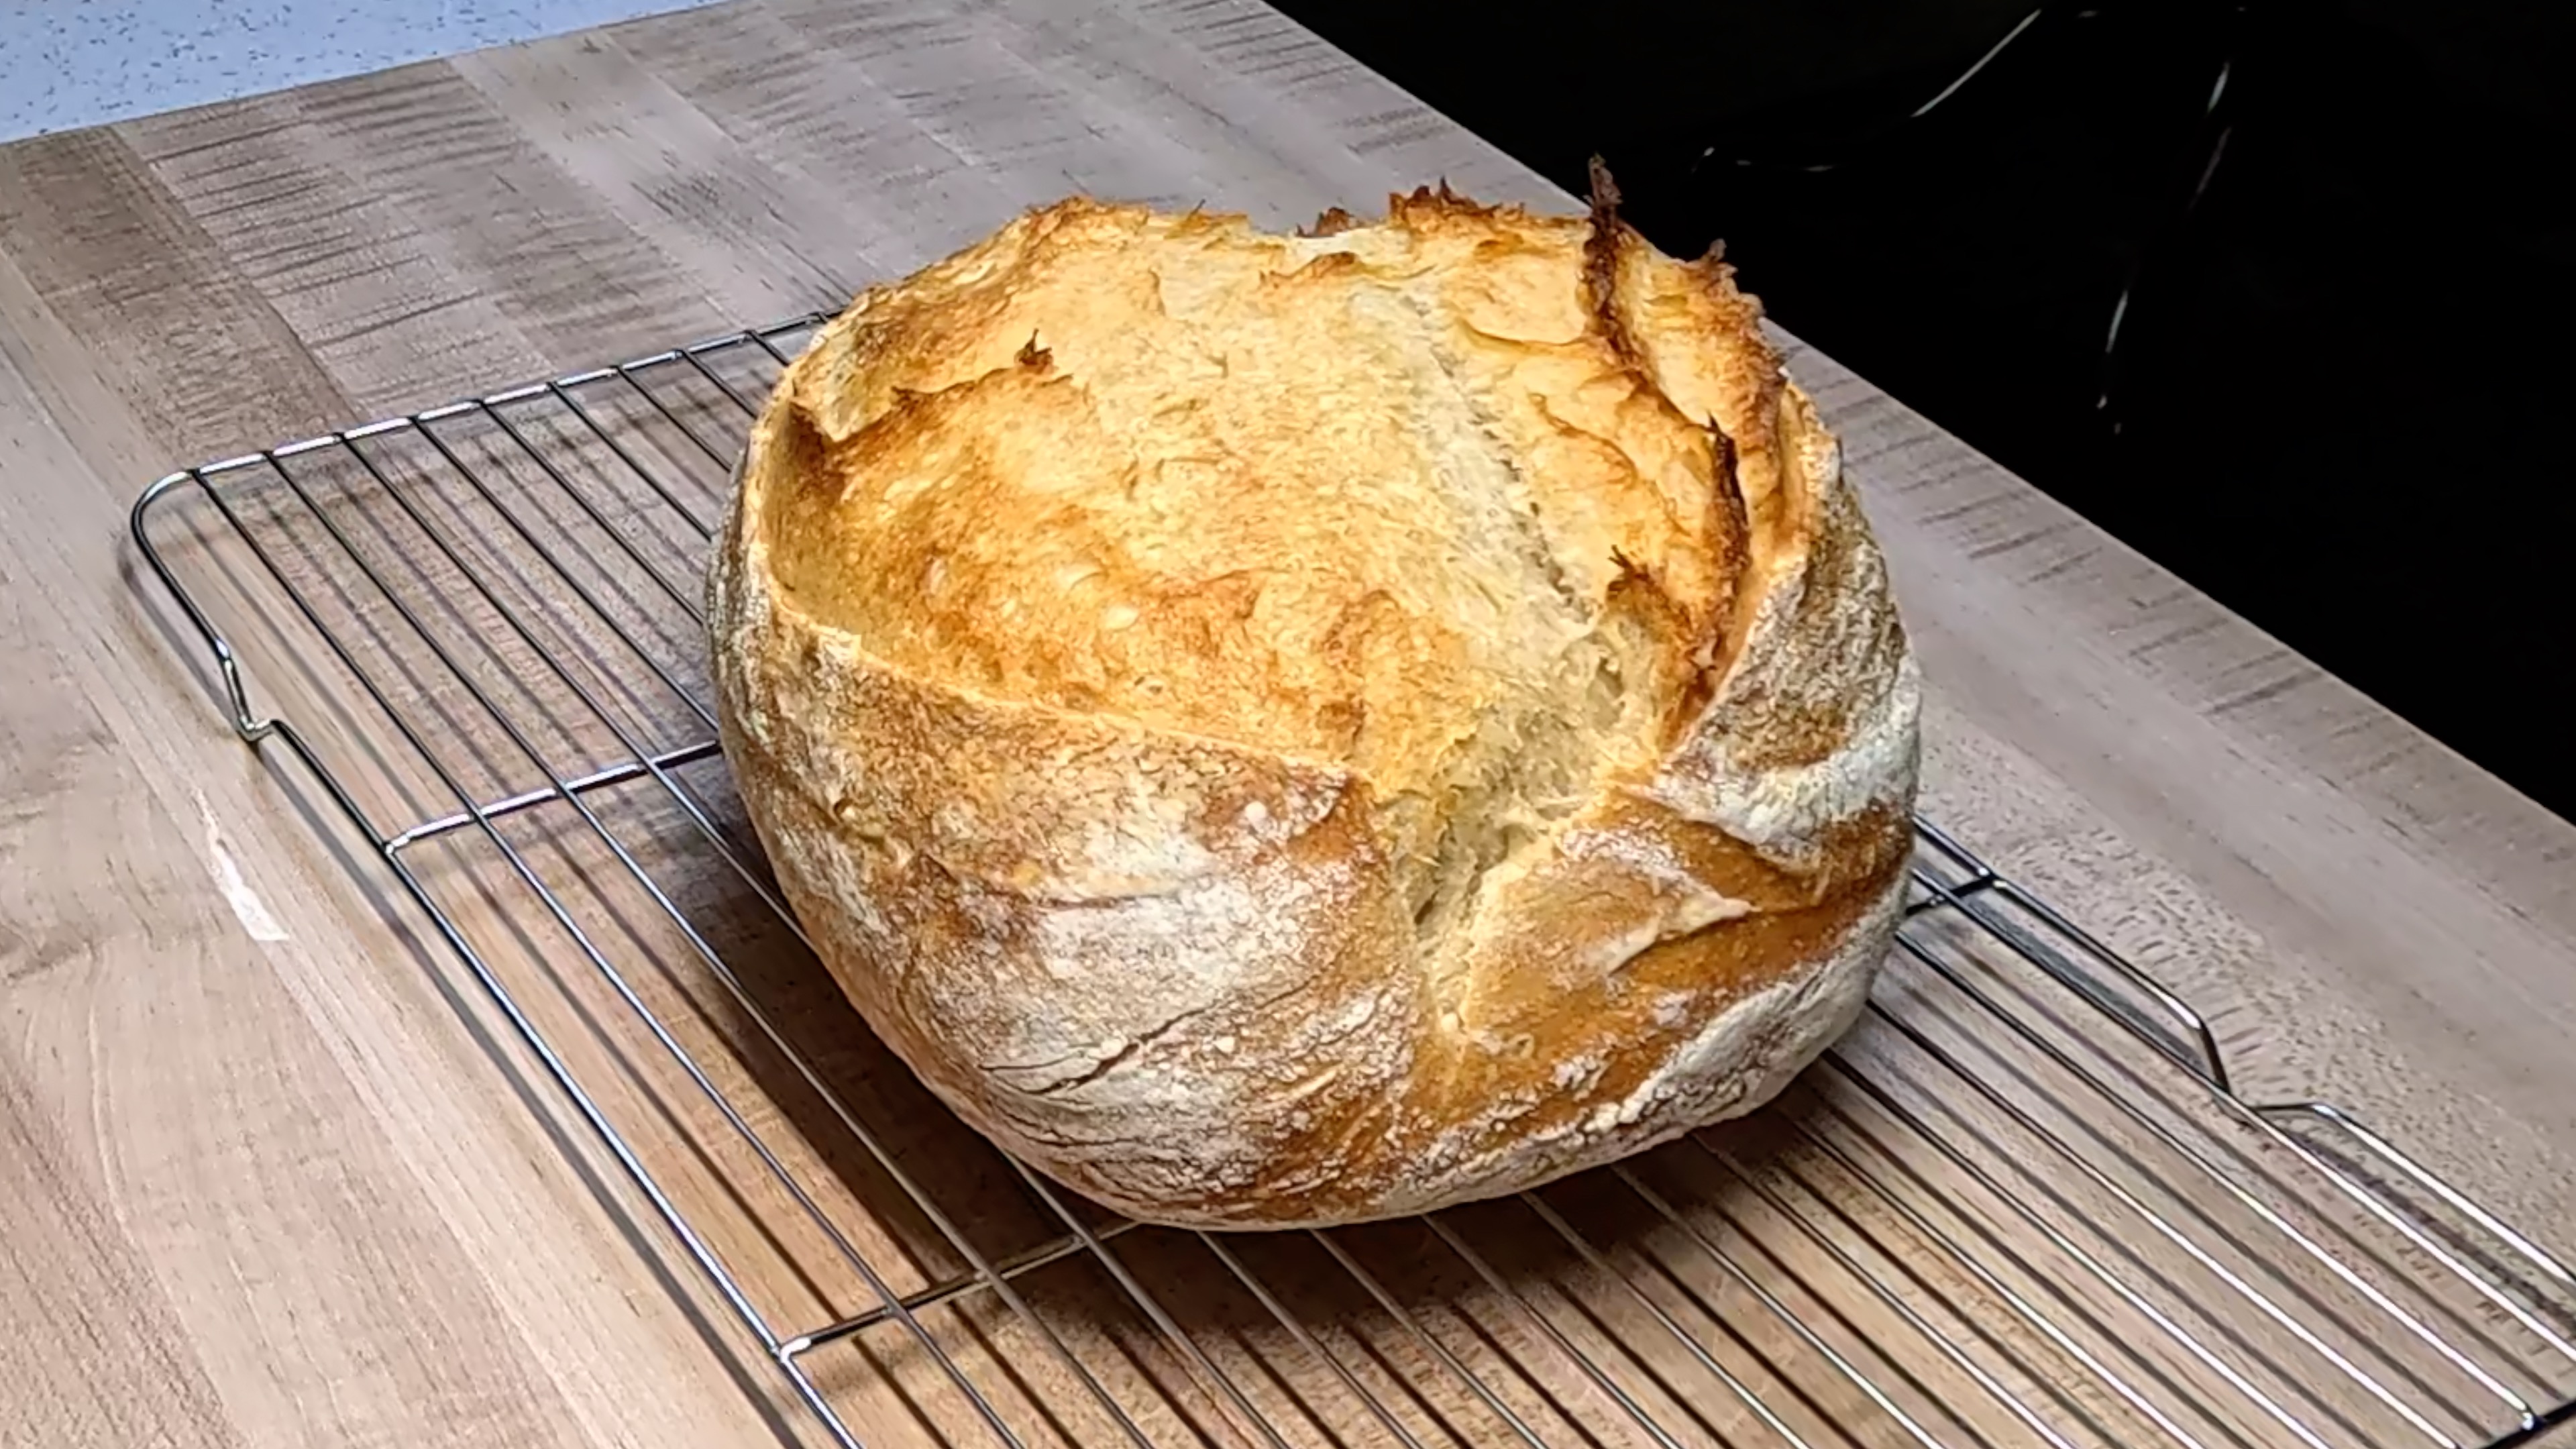
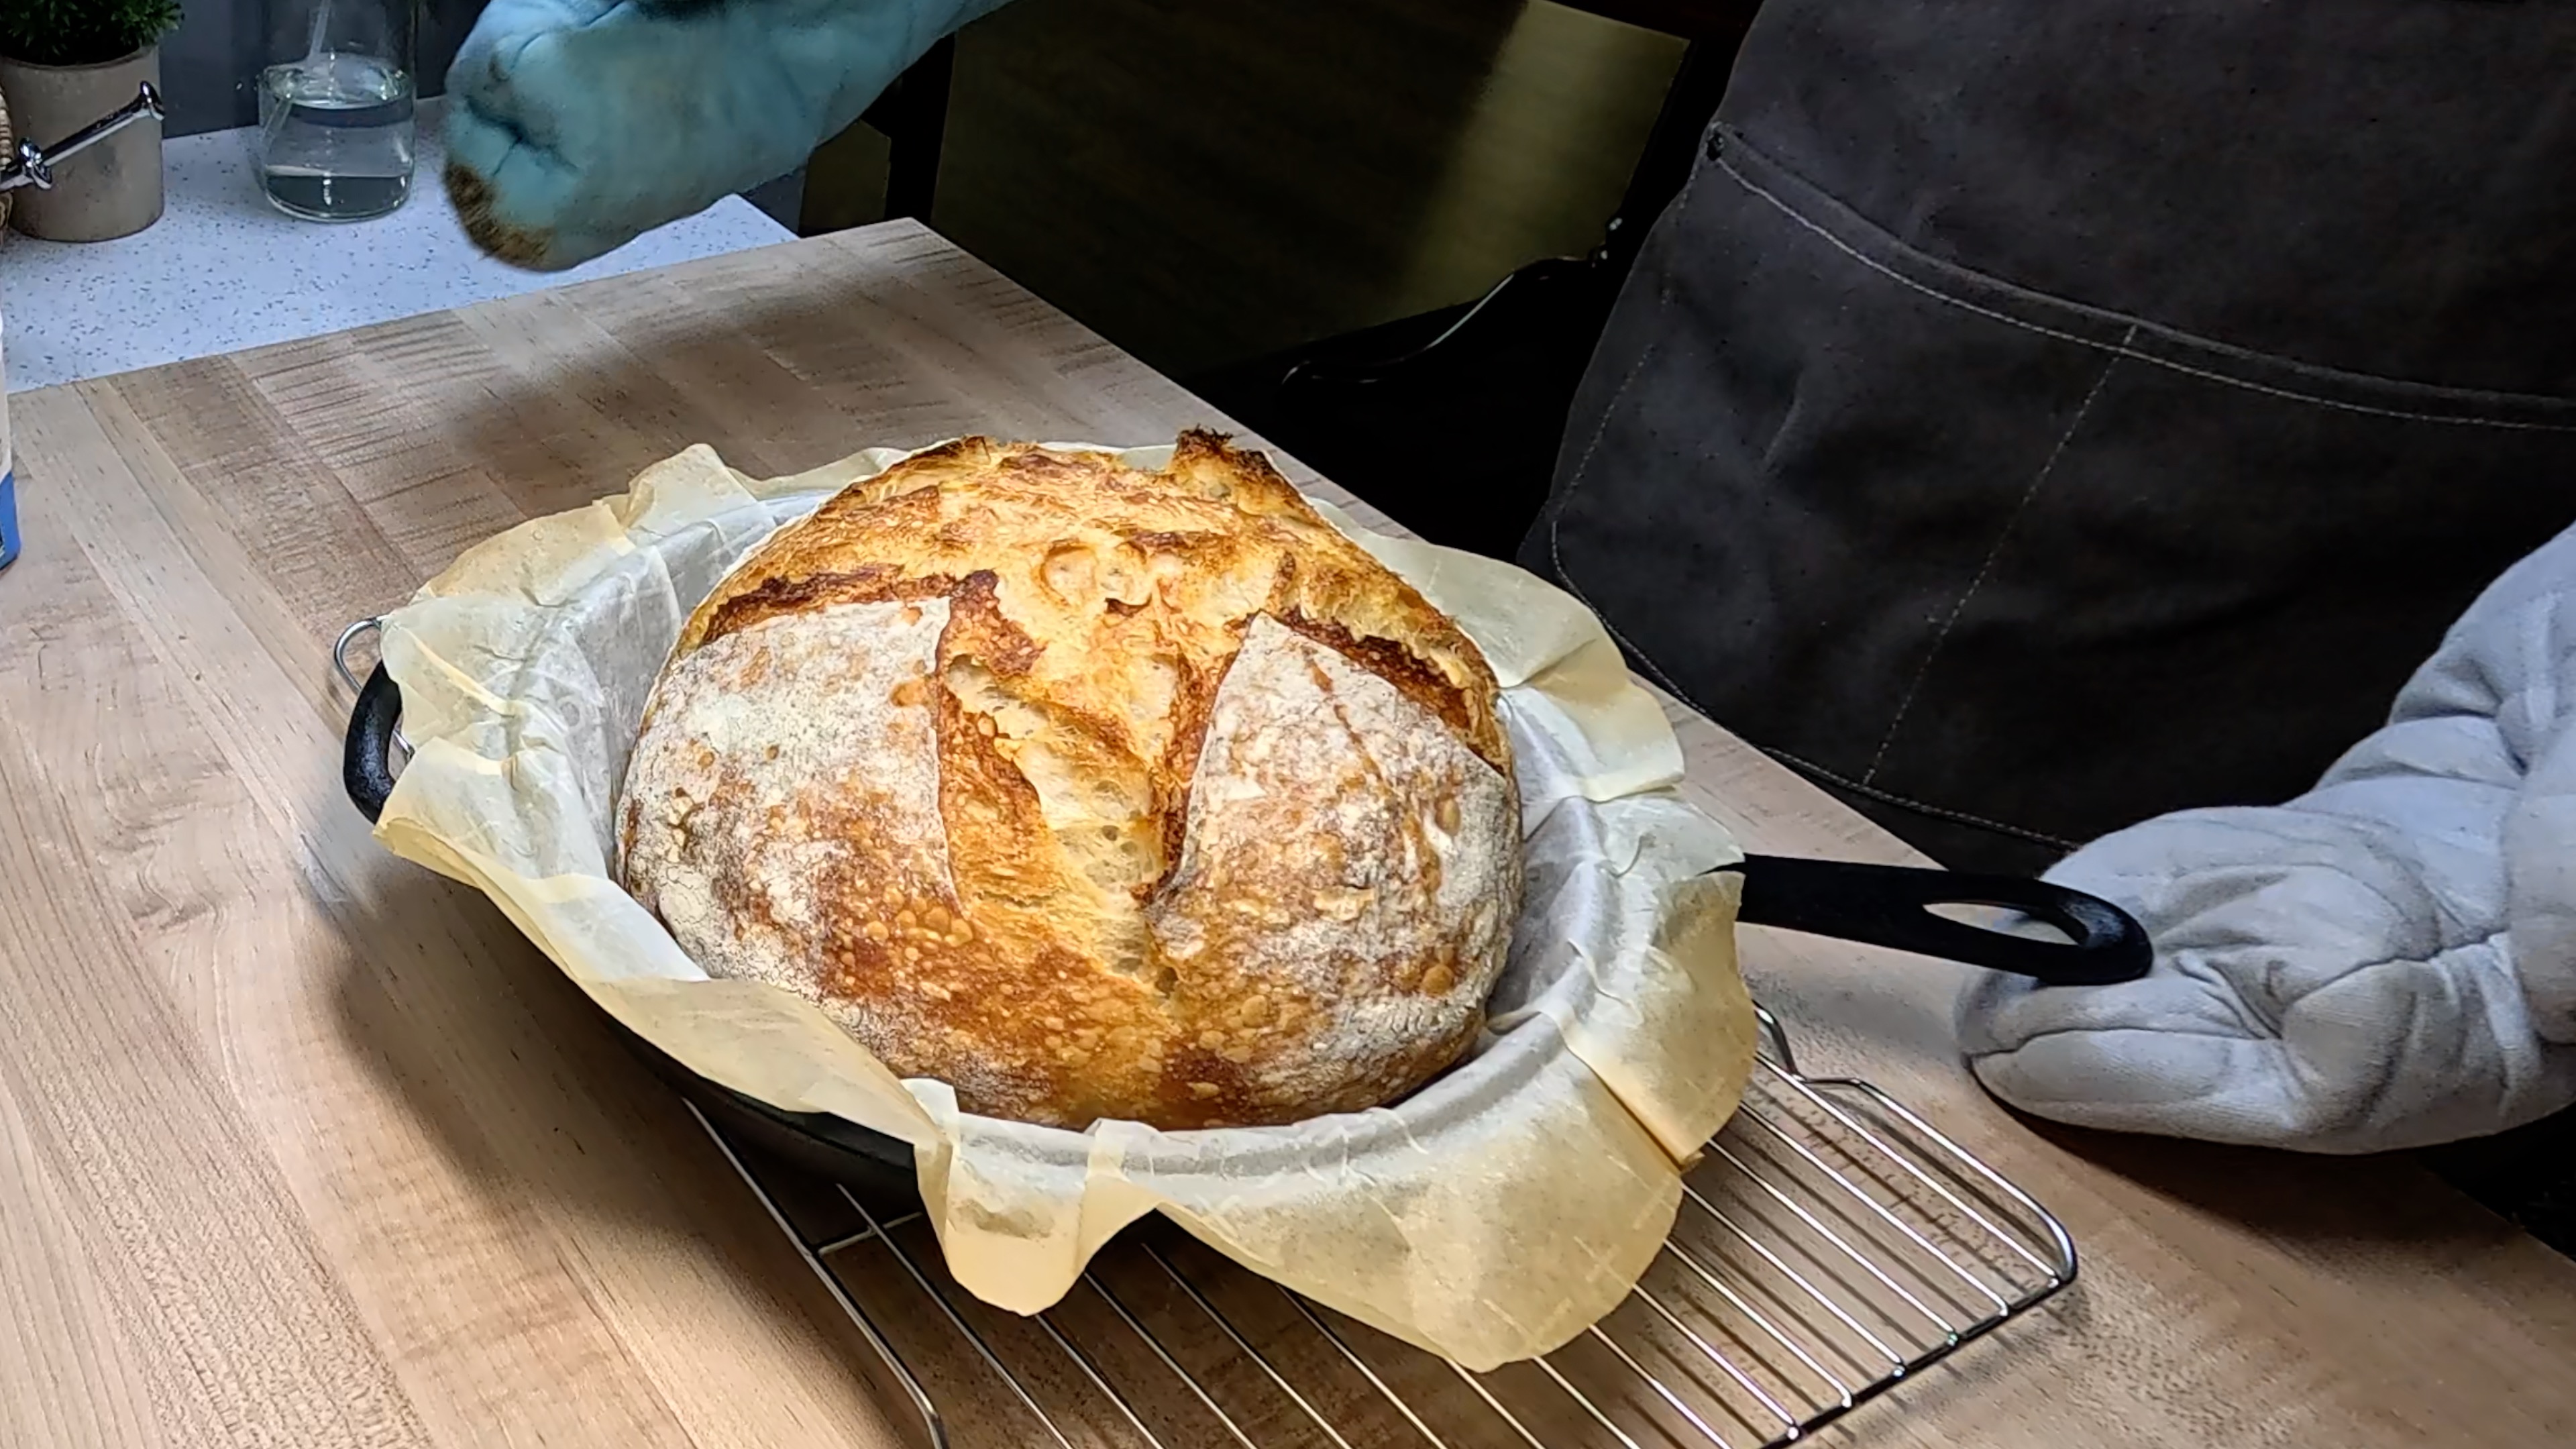
BAKE YOUR BOULE: Using thick oven mitts, carefully remove the screaming-hot Dutch oven from the oven and place it on a heat-safe surface. Remove the lid. Using the parchment paper as a sling, lift the scored dough and lower it gently into the Dutch oven - the parchment will sit right in the base of the pot and acts as a buffer to prevent the bottom from over-browning. Replace the lid firmly and return the Dutch oven to the oven. Bake COVERED at 500°F (260°C) for 20 minutes. During this phase, the trapped steam from the dough creates the perfect humid environment for the crust to stay pliable and expand — this is where your oven spring happens. After 20 minutes, remove the lid carefully (watch for a rush of steam!) and reduce the oven temperature to 450°F (232°C). Continue baking UNCOVERED for another 25 to 30 minutes, until the crust is a deep, burnished mahogany brown and the loaf sounds hollow when you tap the bottom. Don't be shy about the color — a truly baked sourdough is darker than you think. Pull it out when it looks almost too dark, and you'll have nailed it.
- 8
COOL YOUR LOAF: You did it! Carefully lift the baked boule out of the Dutch oven using the parchment sling and transfer it to a wire cooling rack. Step back and listen — you'll hear the crust crackling and singing as it cools, which is one of the most deeply satisfying sounds in baking. Now comes the hardest part: patience. Let the loaf cool on the wire rack for a minimum of 1 hour, and ideally 2 hours, before slicing. This is not just a suggestion — as the loaf cools, the internal crumb is still setting and the steam is redistributing. Slicing too early results in a gummy, undercooked-looking interior even if the loaf is perfectly baked. Set a timer, pour yourself that second coffee, and admire the gorgeous diagonal cross score blooming open across the top of your boule. You've earned this.
Baker's Tips
- •Use a kitchen scale for every measurement — sourdough baking is a science, and precision is what separates a good loaf from a great one.
- •Rice flour is the gold standard for dusting your banneton — it creates a non-stick barrier that guarantees a clean release without gumming up.
- •Cold dough is your scoring best friend — the firm surface lets your blade glide cleanly, producing a defined ear and a dramatic cross score.
- •A longer cold proof (up to 14 hours) develops more complex, tangy flavor; a shorter proof (8 hours) gives a milder, sweeter result.
- •If your dough feels very slack and sticky during stretch and folds, keep going — it will come together by the third set.
- •Every oven is different — get to know your oven's hot spots and consider rotating the Dutch oven halfway through the uncovered bake if you notice uneven browning.
- •Bread flour's higher protein content builds stronger gluten networks, which supports the open crumb and tall structure this boule is known for.
More Like This
Baker's Toolkit
Tools and ingredients we recommend for this recipe
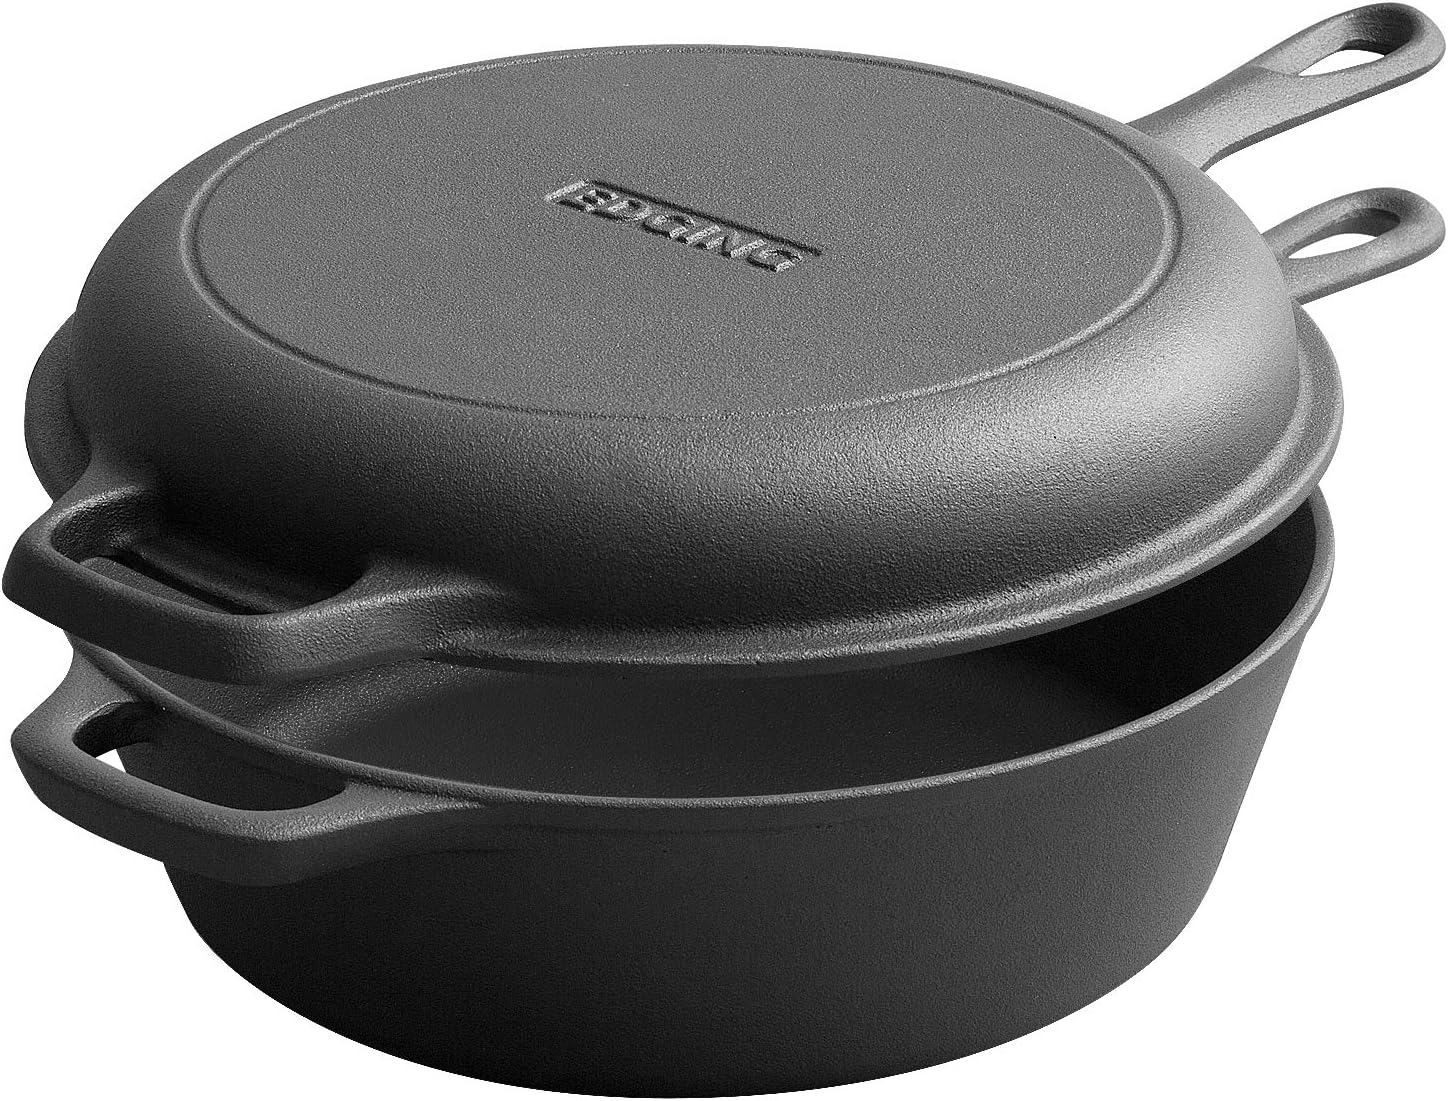
2-in-1 Pre-Seasoned Cast Iron Dutch Oven Pot with Skillet Lid Set, 10" Skillet
View product

KneadAce Cotton Rope Banneton Bread Proofing Basket Set, Oval & Round Bread Baskets with Liners & Covers
View product

Sally's Organics® Empty Clear Glass Spray Bottles - Refillable 16 oz
View product
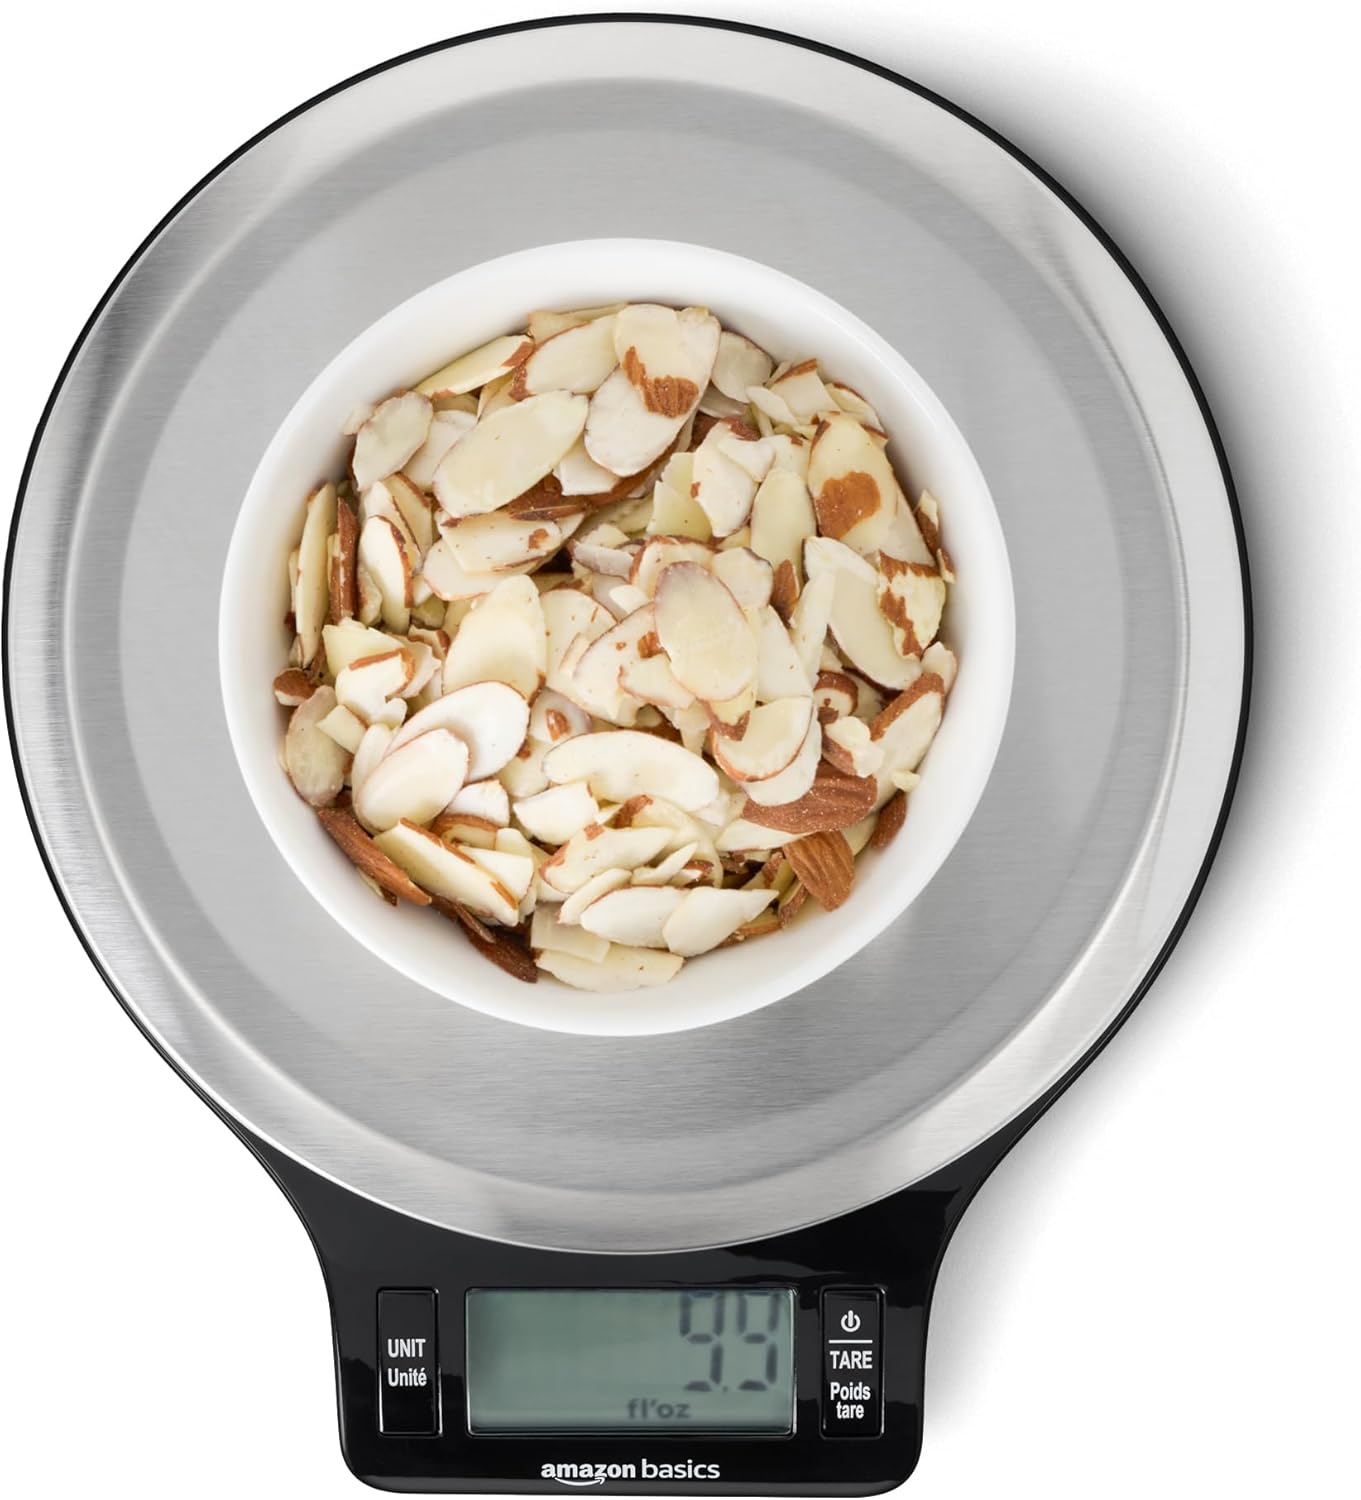
Amazon Basics Digital Kitchen Scale with LCD Display
View product
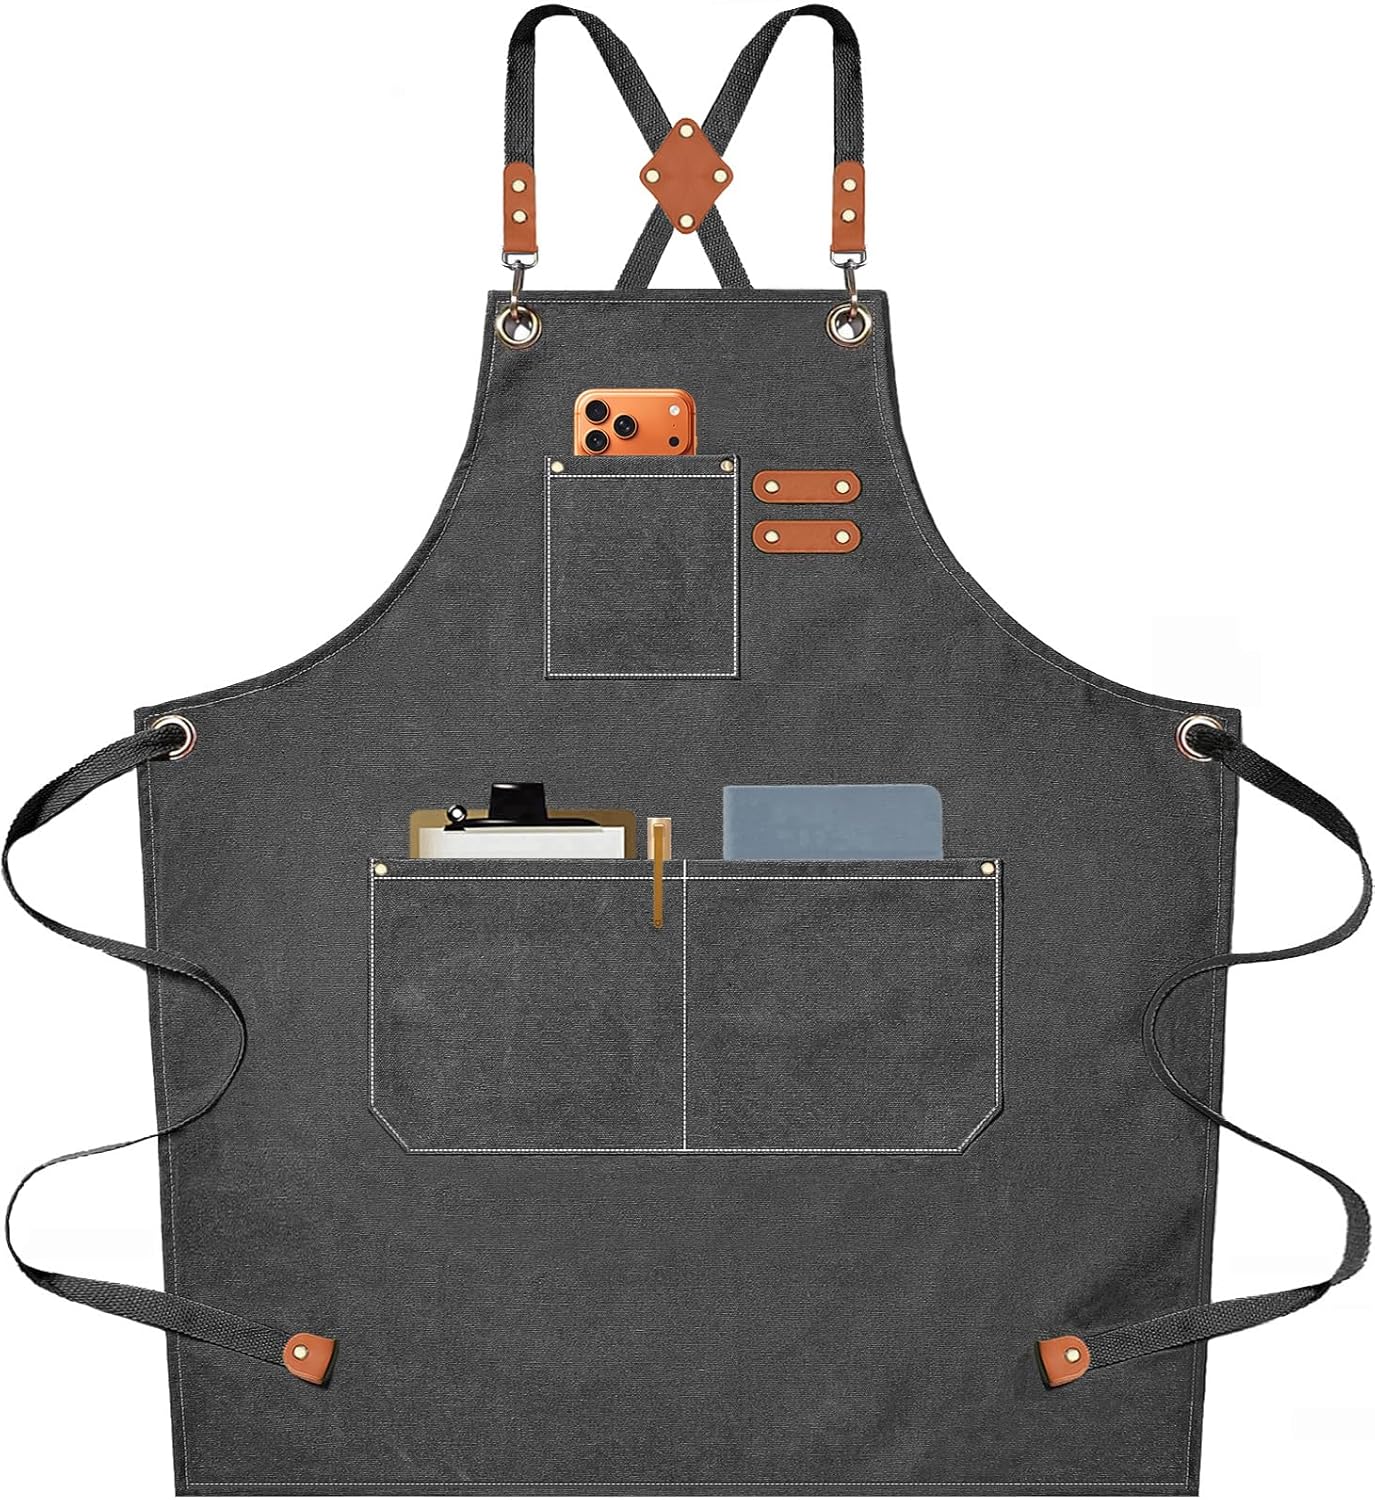
AFUN Chef Aprons for Men Women with Oversized Pockets
View product
Comments
Sign in to join the conversation
Sign In