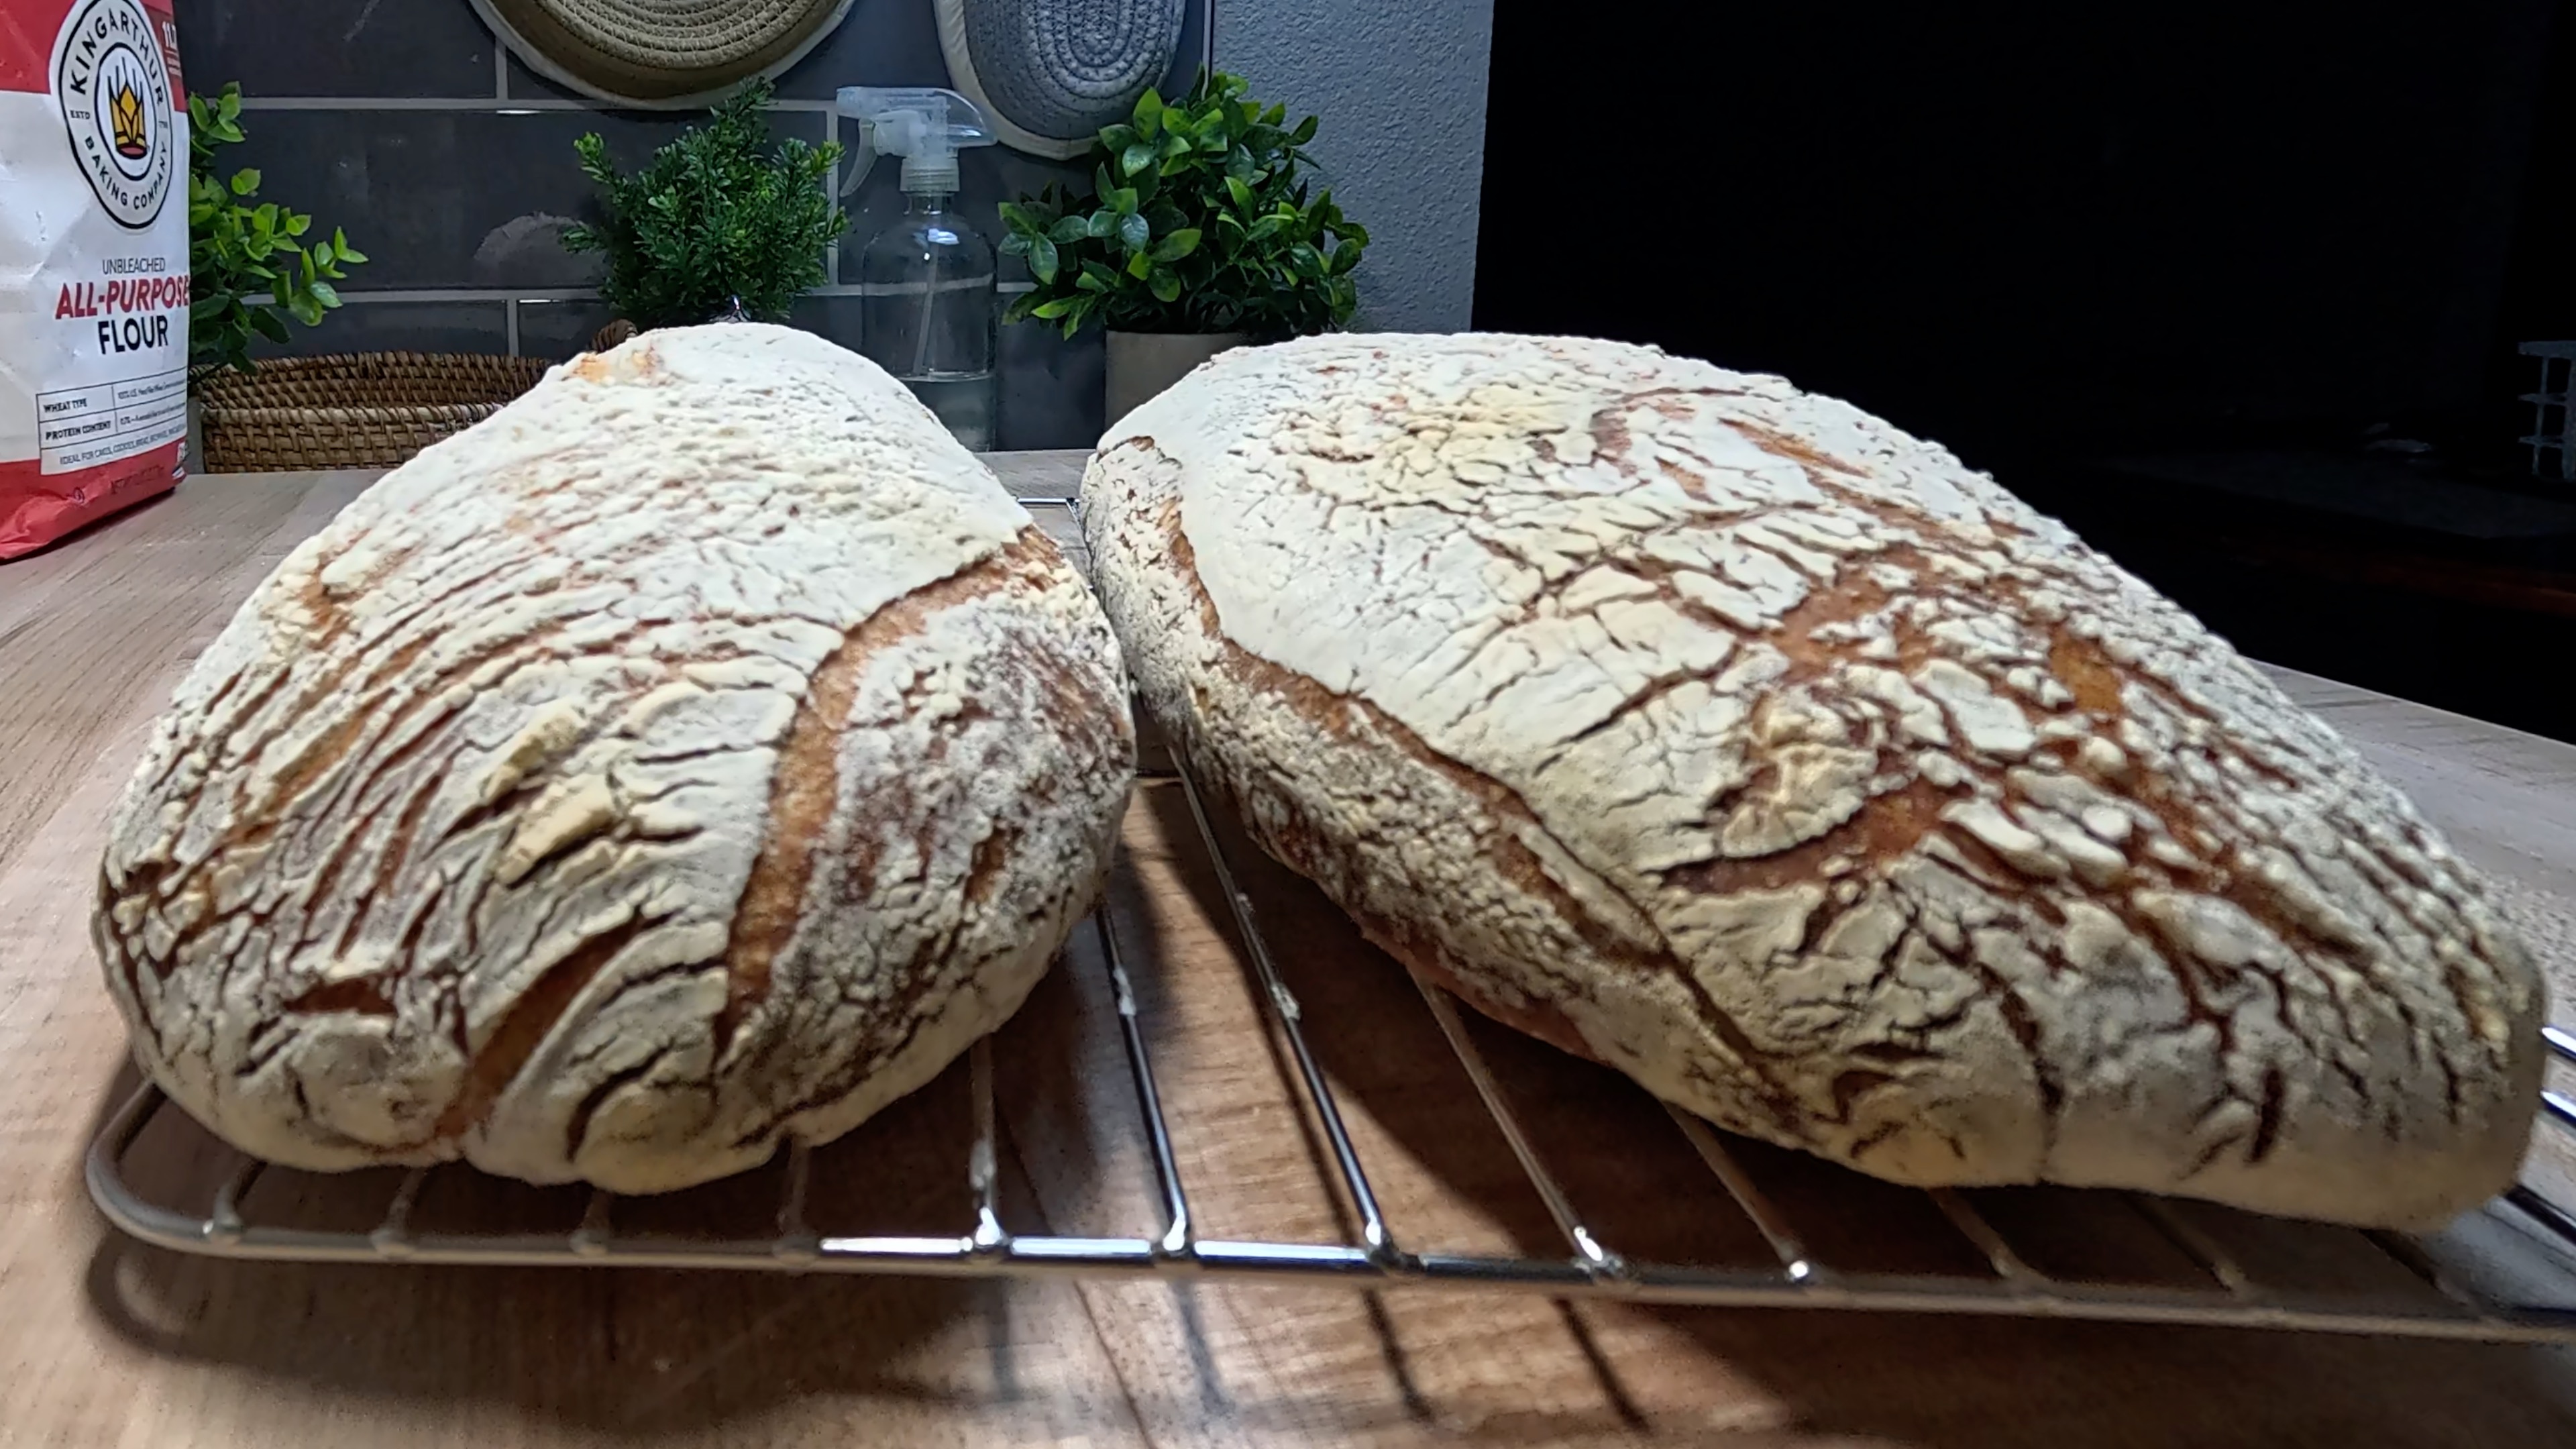
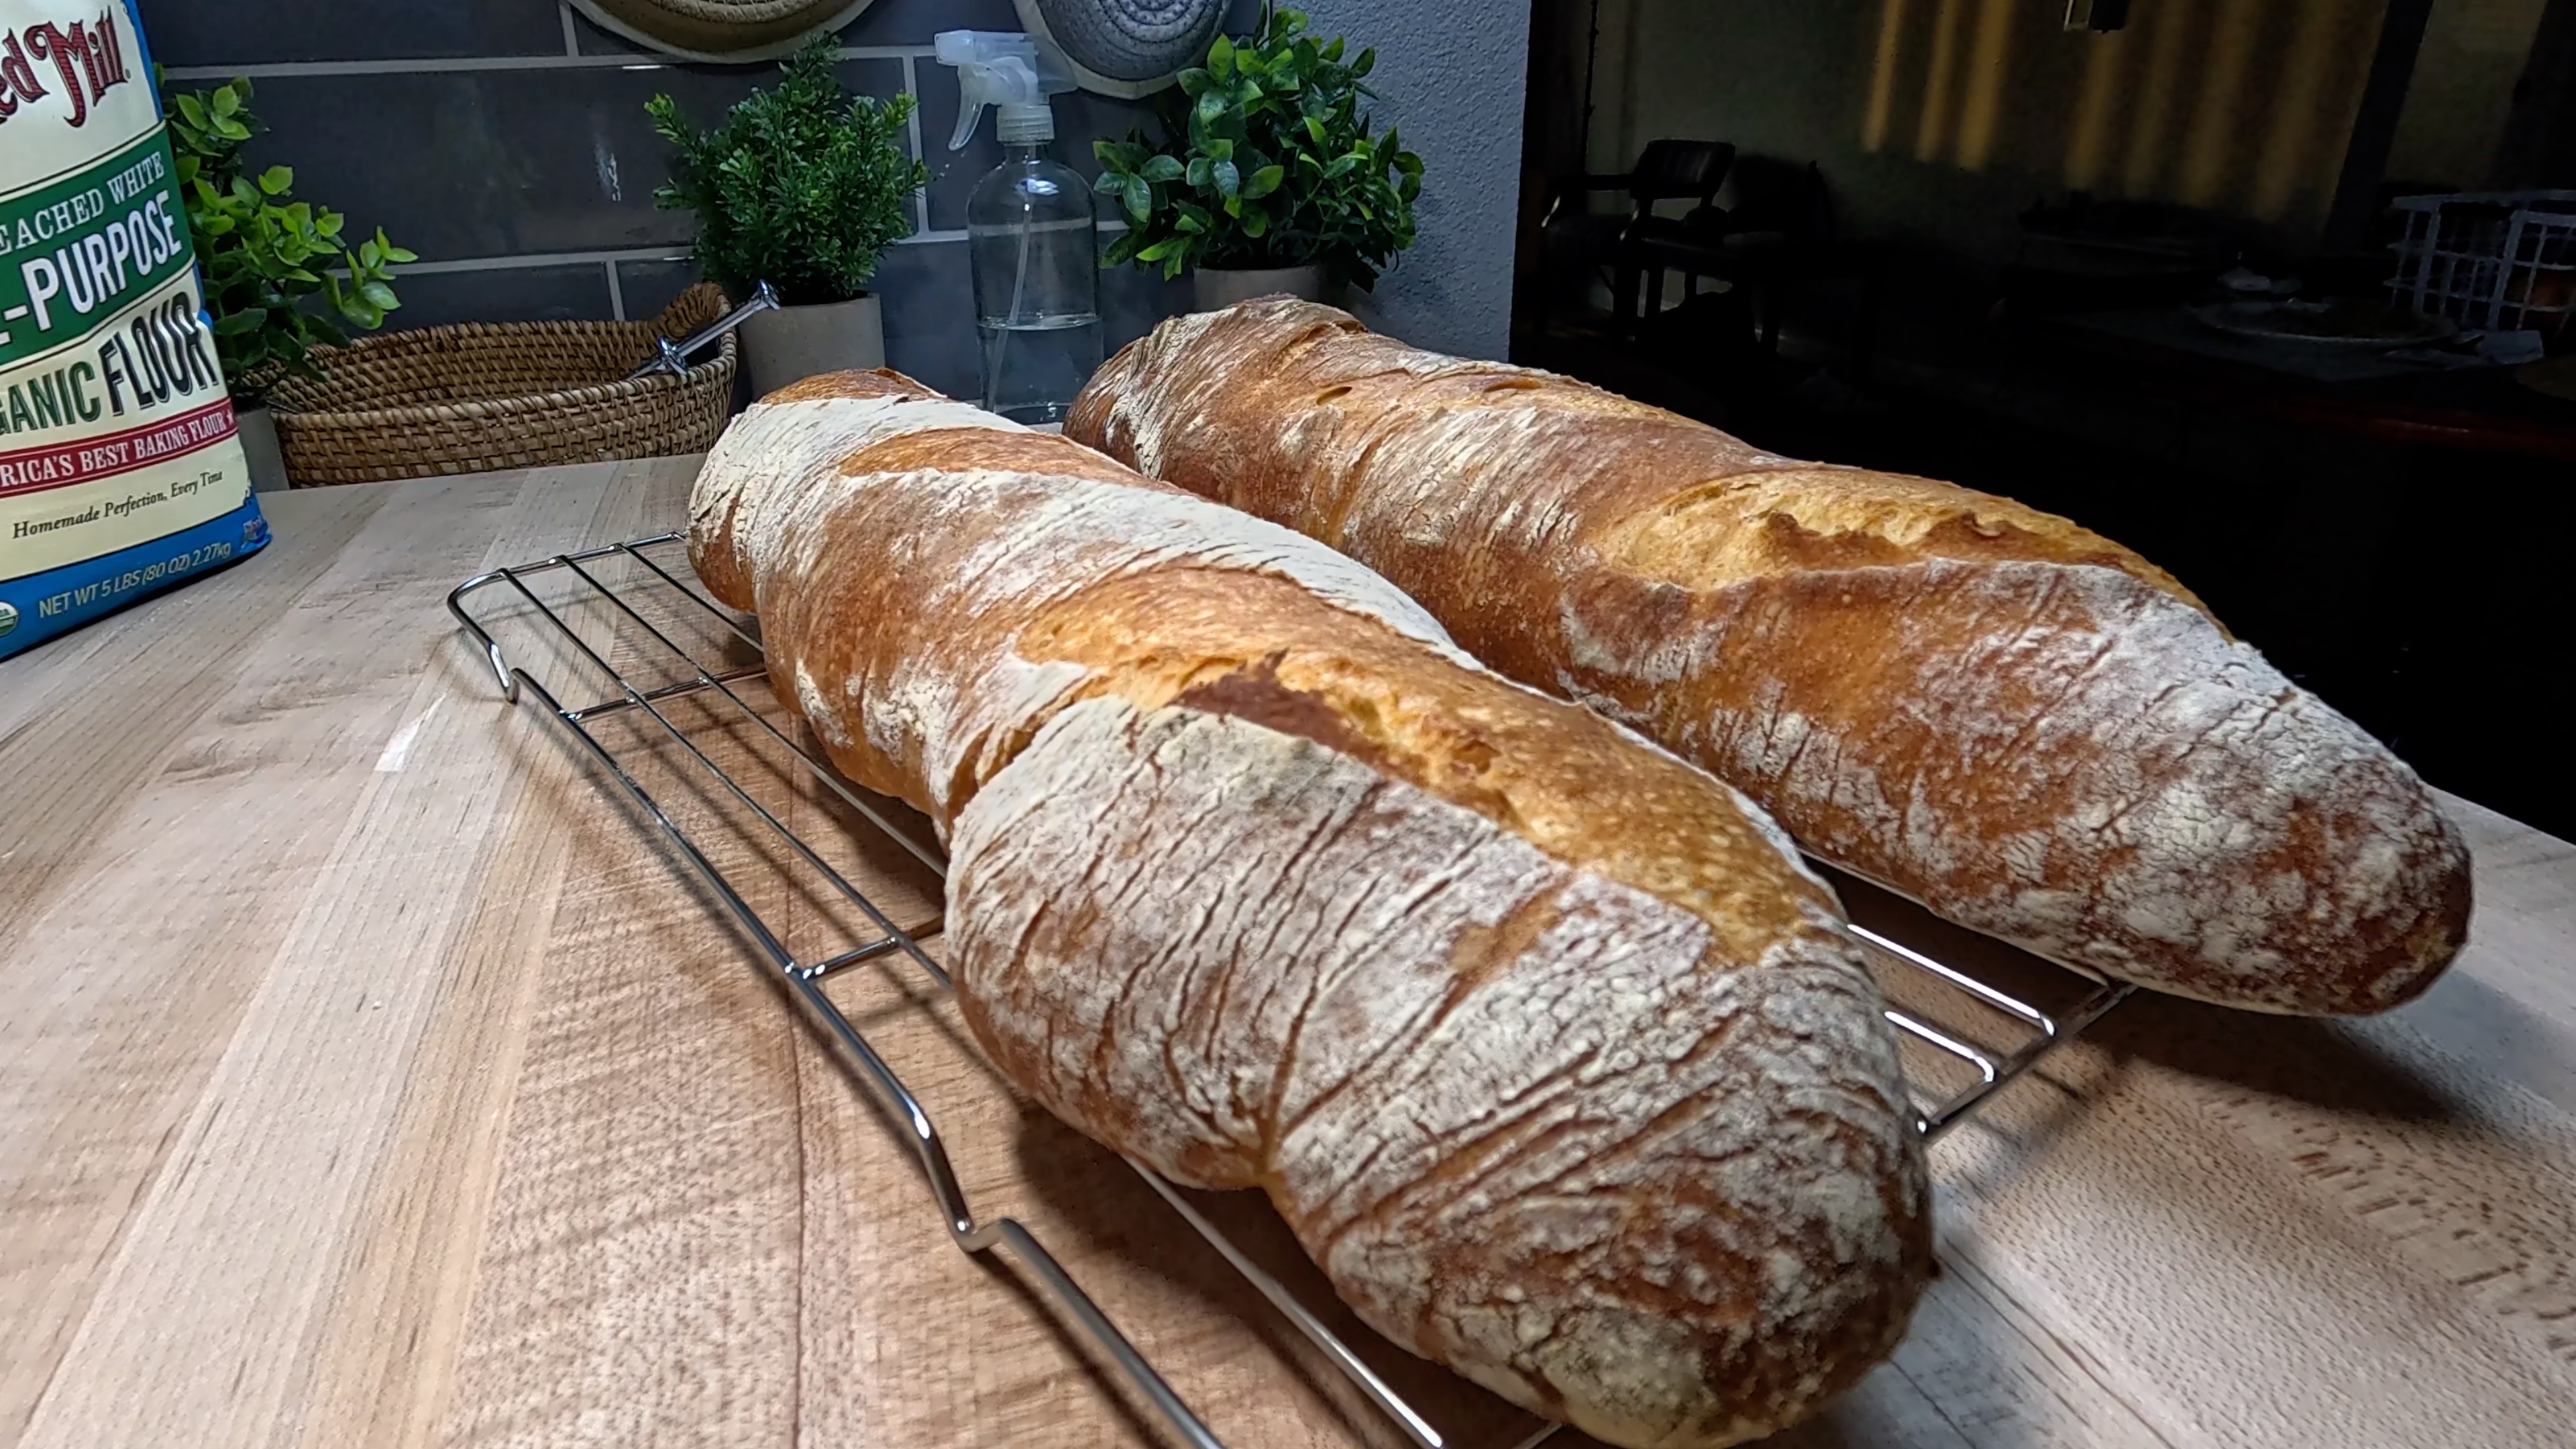
Rustic Sourdough Ciabatta with Golden Open Crumb
Classic Italian bread with signature holes and chewy crust - perfect for sandwiches or dipping in olive oil
Instructions
- 1
FEED YOUR STARTER: In a clean jar, combine 50g starter with 50g flour and 50g room temperature water. Stir well until no dry flour remains - the mixture should look like thick pancake batter. This 1:1:1 ratio will give your starter the perfect boost of energy. Cover loosely and let rest at room temperature for 6-8 hours. Your starter is ready when it has doubled in size, smells pleasantly tangy, and passes the float test (a small spoonful floats in water).
- 2
MIX DOUGH: In a large mixing bowl, combine 425g room temperature water with 120g active starter. Stir vigorously until the starter completely dissolves - no lumps should remain. Add 12g salt and stir until dissolved. Now add all 500g flour at once and mix with a silicone spatula until you have a shaggy, sticky dough with no dry flour visible. The dough will look quite wet and rough - this is exactly what we want for ciabatta's open crumb structure!
- 3
STRETCH & FOLDS: Perform 3 sets of stretch and folds, spacing them 45-60 minutes apart. For each set: wet your hands, grab one side of the dough, stretch it up and fold it over to the opposite side. Rotate the bowl 90° and repeat 3 more times. You'll notice the dough becoming smoother and stronger with each set - this is the gluten developing! After the final set, the dough should feel more cohesive and have a slight jiggle when you shake the bowl.
- 4
COLD PROOF: Immediately after your final stretch and fold, cover the bowl tightly with plastic wrap and refrigerate for 8-16 hours. This slow, cold fermentation develops complex flavors and makes the dough easier to handle. The dough should increase by about 50% in size and feel slightly firmer when you're ready to work with it tomorrow.
- 5
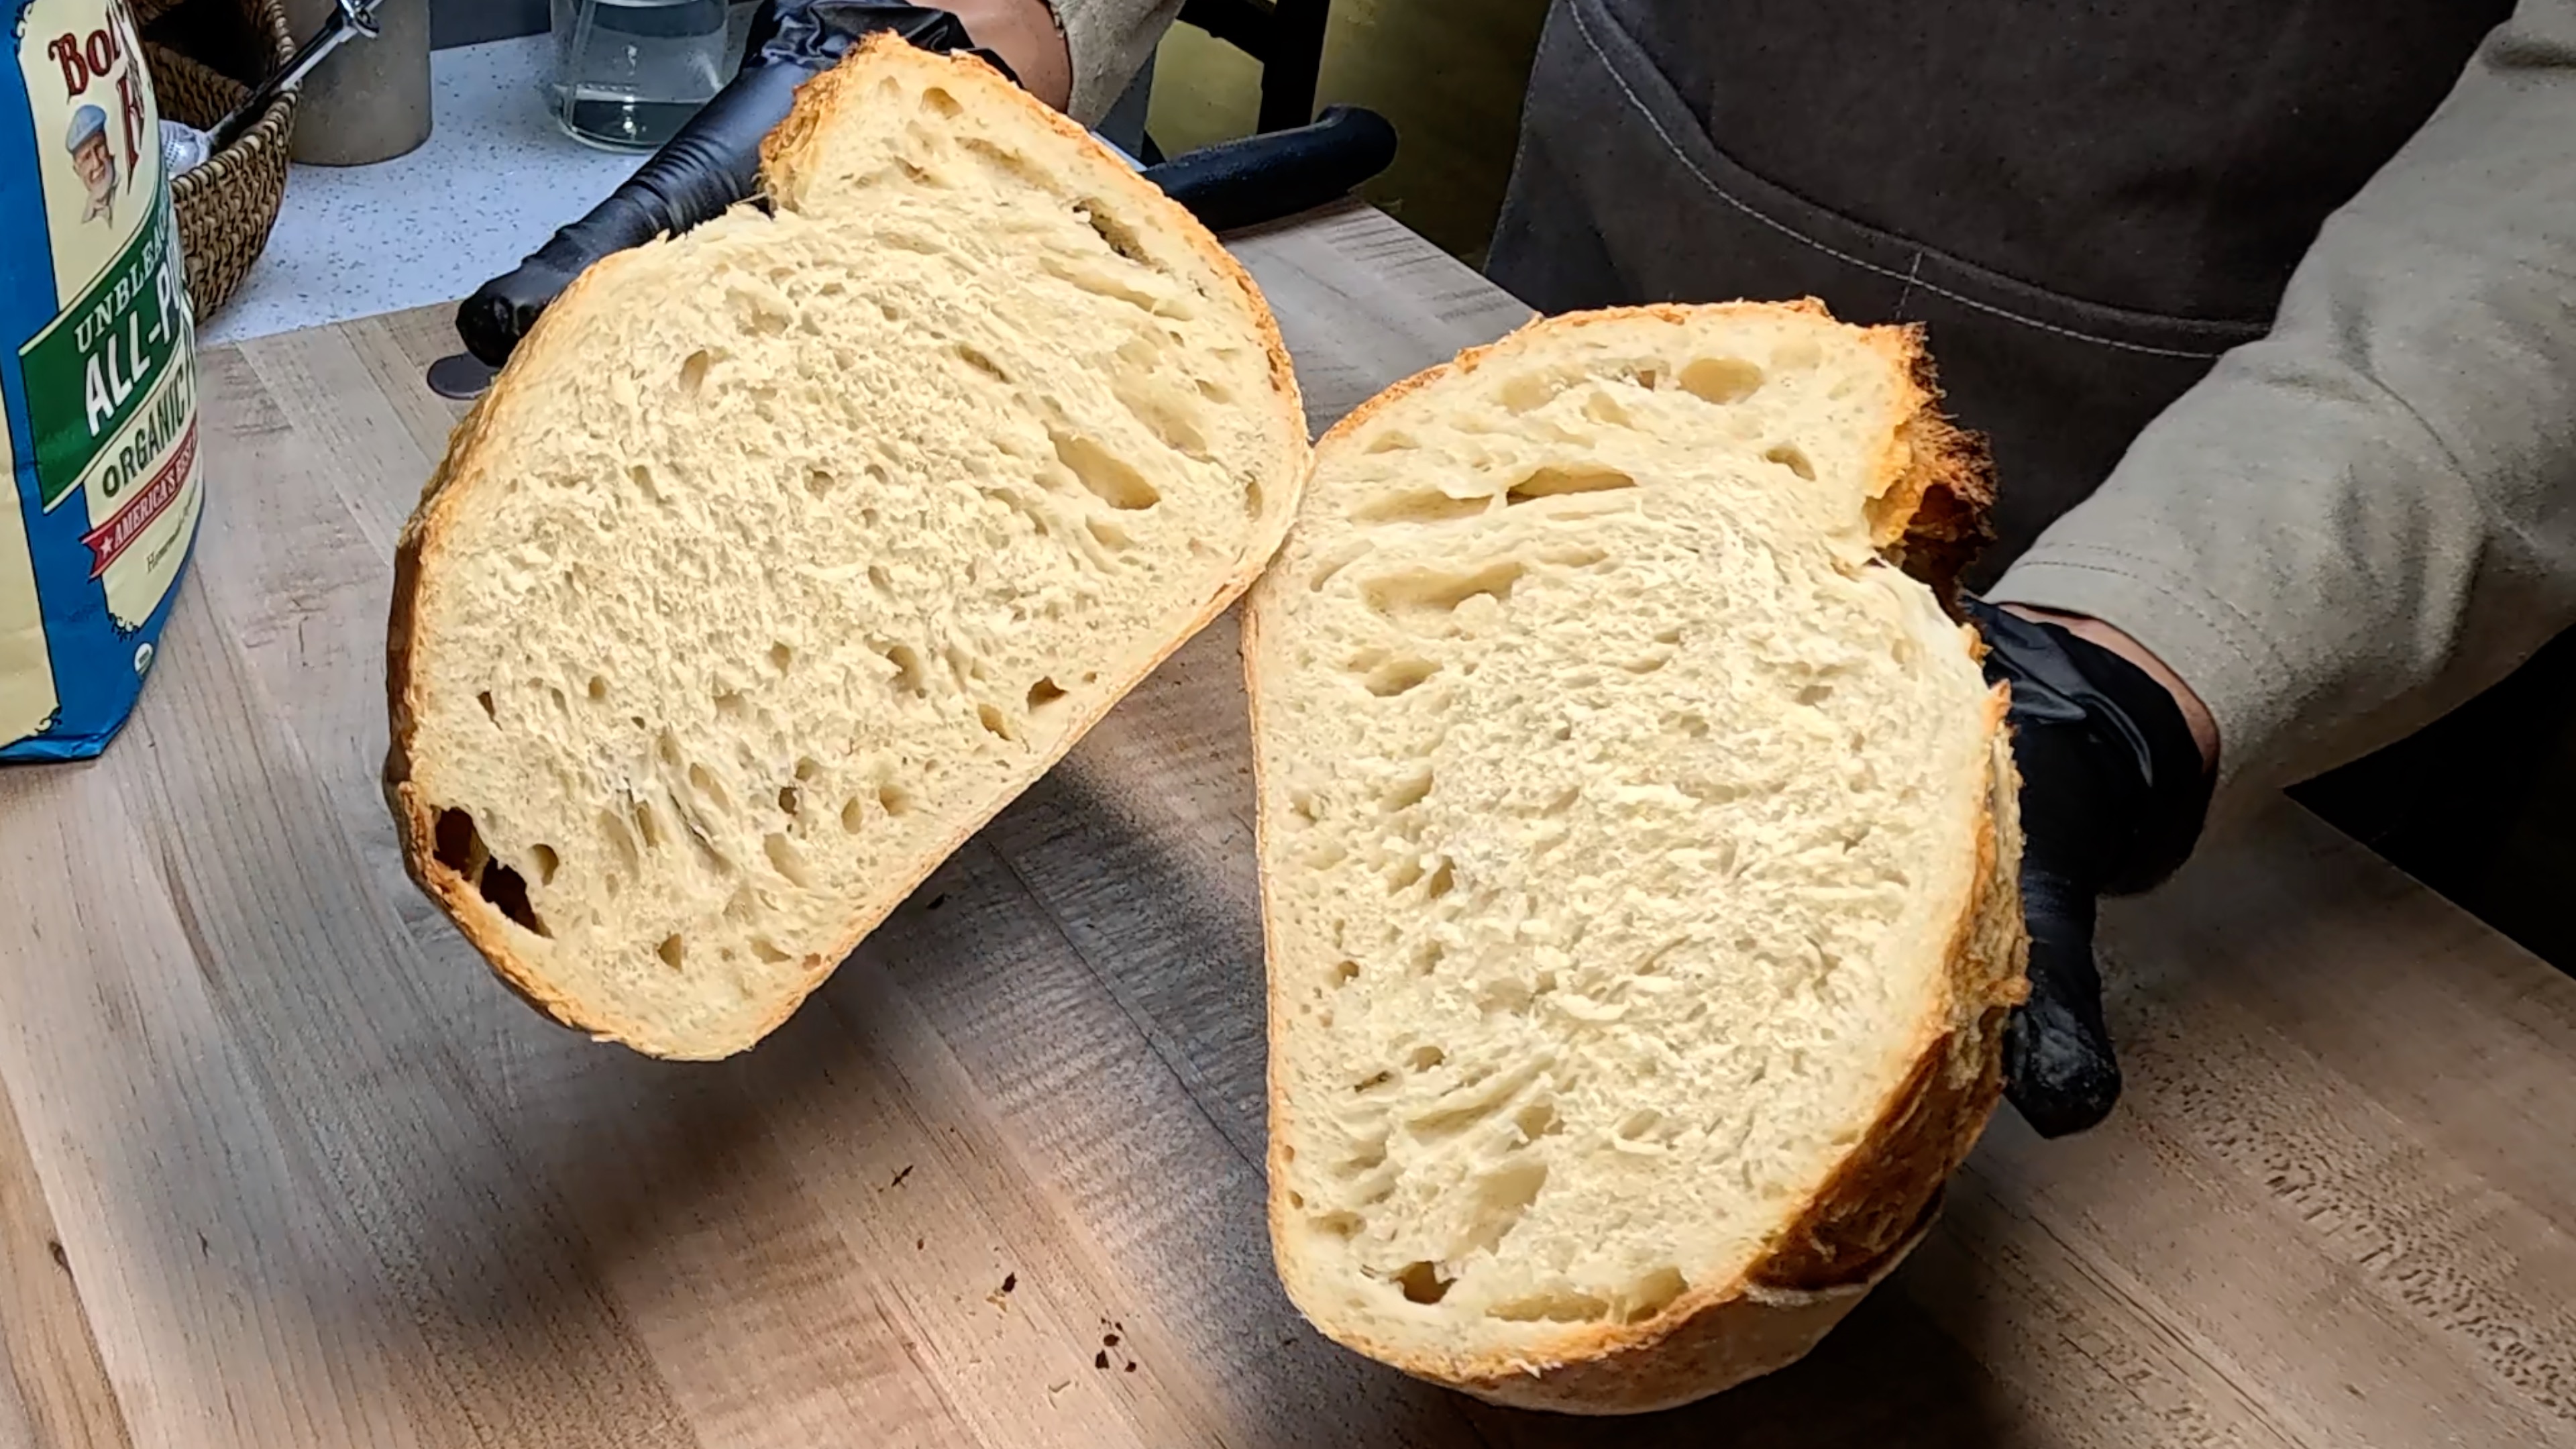
PRE-SHAPE: Remove dough from refrigerator and turn it out onto a generously floured work surface. The dough will be quite sticky, so flour your hands well. Gently stretch the dough into a large rectangle, being careful not to deflate too many bubbles. You should see lovely air pockets throughout - these will become ciabatta's signature holes!
- 6
DIVIDE & SHAPE: Using a bench scraper, divide the rectangle into 2 equal pieces. For each piece, gently fold the edges under to create a rough loaf shape - don't worry about perfection, ciabatta should look rustic! Place each shaped loaf seam-side UP on parchment paper that's sitting on a kitchen towel. Cover with another kitchen towel (no plastic wrap needed).
- 7
FINAL PROOF: Let the shaped loaves rest at room temperature for 45-60 minutes. They should feel slightly puffy and show a gentle increase in size - they won't double like other breads. The surface should look smooth with some bubbles visible underneath. When you gently poke the dough, it should slowly spring back about halfway.
- 8
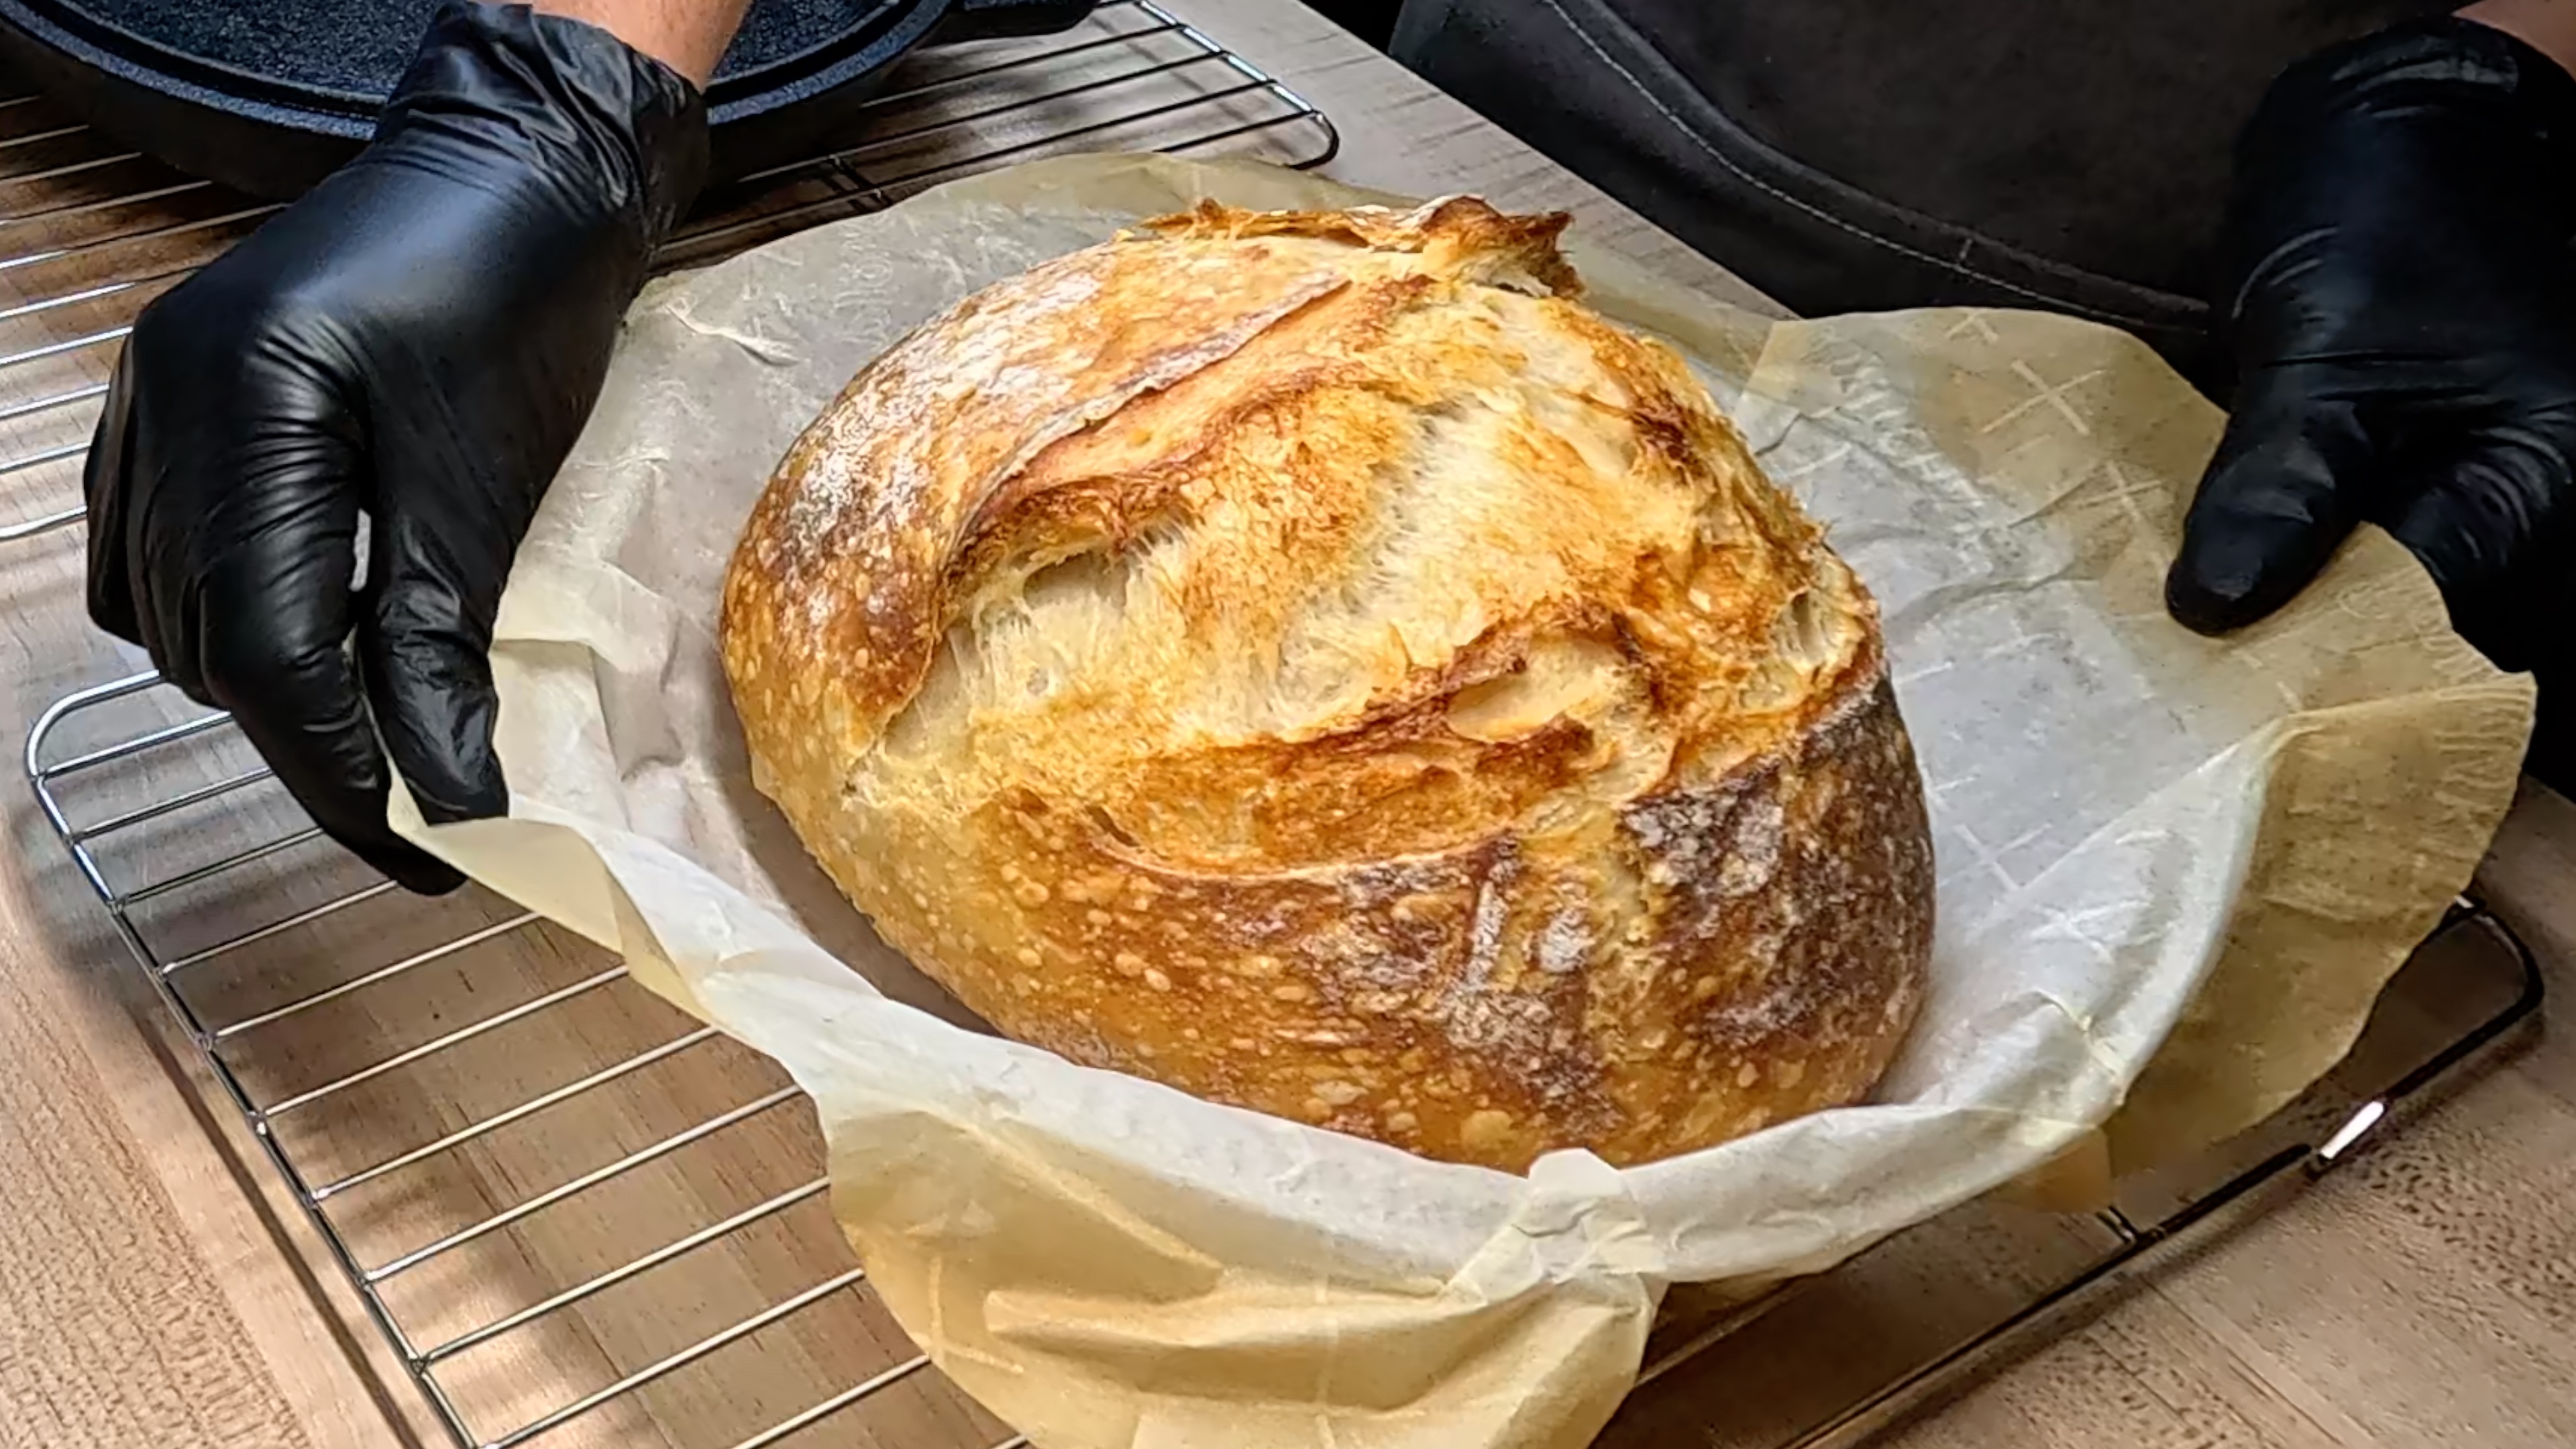
PREHEAT OVEN: Place a baking stone on the middle rack and a cast iron pan on the bottom rack. Preheat your oven to 500°F for at least 45 minutes. The stone needs to be thoroughly heated to create that crispy crust ciabatta is famous for. Have 1 cup of hot water ready for creating steam.
- 9
TRANSFER & BAKE: Working quickly, place a piece of parchment paper on top of each loaf and flip them over so the seam side is now down. Slide the loaves (still on parchment) directly onto the hot baking stone. Immediately pour the hot water into the cast iron pan to create steam, then close the oven door quickly. Bake for 20 minutes, then remove the steam pan and continue baking for 25-30 minutes until golden brown.
- 10
COOL & ENJOY: Transfer the baked loaves to a wire rack and let them cool for at least 1 hour before slicing. Listen for the symphony of crackles as the crust cools - this is the sound of success! The internal crumb will continue to set during cooling, giving you that perfect chewy texture with gorgeous holes throughout.
Baker's Tips
- •Ciabatta dough should be quite sticky and wet - this high hydration creates the open crumb
- •Handle the dough gently throughout to preserve air bubbles
- •The rustic, imperfect shape is authentic - embrace the irregularities!
- •Steam is crucial for the crispy crust - don't skip this step
Comments
Sign in to join the conversation
Sign In